Bokashi Composting: A Step By Step Instructional Guide
Bokashi composting is an anaerobic fermentation process that relies on inoculated bran to ferment kitchen waste, including meat and dairy, into a safe soil builder and nutrient-rich tea for your plants.


#1 Bokashi Composter
Available Here
Bokashi Bucket w/ Starter
NO turning! Uses beneficial bacteria to quickly ferment table scraps.
$54.95Learn moreBokashi is a composting method of fermentation that you can easily do at home with just a few simple steps that involve sealing kitchen scraps and organic waste in an airtight container with a medium.
The finished product is an extremely nutrient-dense plant food that may be buried in compost trenches in a garden.
It is an anaerobic fermentation process that relies on inoculated Bokashi bran to ferment kitchen waste, including meat and dairy, into a safe soil builder and nutrient-rich tea for your plants.
In Bokashi composting, food scraps of all kinds including those that are banned from traditional composting methods like meat, and dairy products are mixed with some of the inoculated bran, pressed into the Bokashi bucket, covered with another handful of bran, and tightly covered. When the bucket is full, it is sealed shut and set aside for ten to twelve days.
Every other day during that time, you can use the handy spigot in the Bokashi bucket to drain the liquid which is an inevitable byproduct of this composting process. This liquid is also known as ‘Bokashi tea’ and is an invaluable asset for your houseplants since it’s packed with nutrients.
When it comes to looking after Bokashi, draining this liquid is all that’s needed! This makes it a quick, cheap, and easy process every home gardener should learn, and how guide lays out everything you’ll ever need to do Bokashi composting properly at home.
When the bucket is opened, the food waste, though recognizable, is thoroughly pickled. At this stage, the ‘pre-compost’ can be buried in a fallow spot in the garden. One Caution: It is still so acidic that plant roots should not come in contact with it for two to four weeks.
If you’ve always wanted to learn how to compost at home but found it too intimidating, Bokashi is the perfect place to start. Learn everything you need to know about Bokashi in this complete guide.
What is Bokashi?
The term Bokashi is a Japanese word that means “fermented organic matter.” Bokashi is essentially a system that pickles your food waste before it turns into nutritious liquid compost ready to put back into the garden soil.
To start with Bokashi you’ll need a medium. The Bokashi host medium can be almost any fine organic grain or grass-like substance — bran, rice, wheat mill run (WMR, a waste product from flour milling), used mushroom growth medium, dried leaves, or even sawdust.
They’re all added to your Bokashi bucket that comes with a spigot to drain the liquid that occurs due to this anaerobic composting process.
Unlike traditional composting, which is an aerobic process that requires oxygen for the composting process to work, Bokashi is an anaerobic process that requires isolating the materials as much as possible from oxygen.
This means the bucket should only be opened to add scraps, not to inspect the contents regularly.
The Bokashi system has many benefits over traditional composting methods because it’s not only cheaper but also faster to do while producing fermented material that gives off less odor and is easier to maintain.
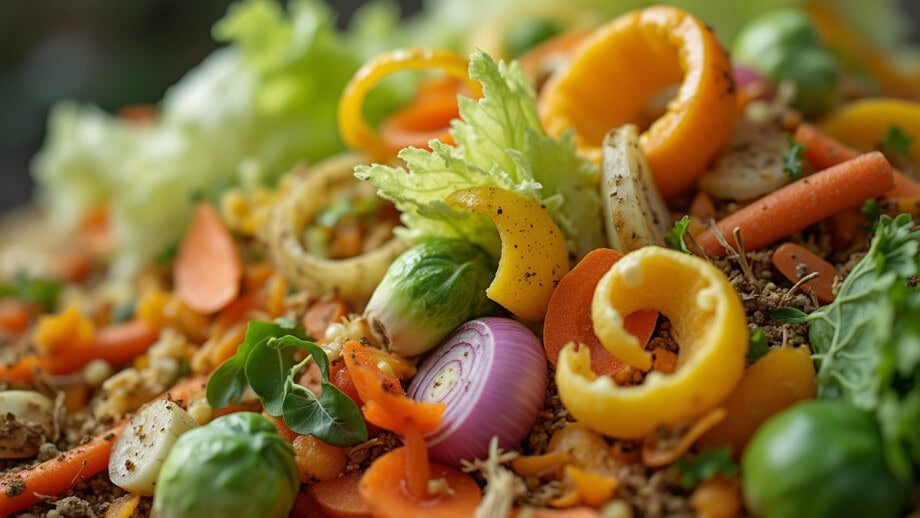
But that’s not all, the best part about Bokashi is that you can use many kitchen scraps and organic waste that you can’t otherwise use in traditional composting, including meat and dairy products, fruits and vegetables, cooked and uncooked food, eggs, bread, coffee grounds, leaves, wilted flowers, etc.
What is the Bokashi Bran?
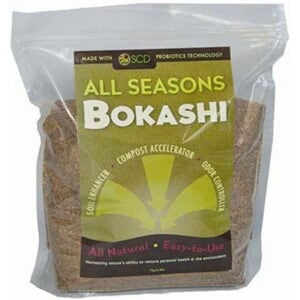
For Bokashi, you’ll need Bokashi bran and a Bokashi bucket that comes with a spigot. This medium is inoculated with beneficial microbes that flourish in anaerobic, acidic environments but smell less foul than do those in unfettered, natural anaerobic conditions.
To prepare the inoculant, a brew that will attract the appropriate bacterial strains is prepared, the host material is immersed in it, and the microbes are allowed to ferment.
Molasses provides an energy source for the microbes, which reproduce wildly for several days. Once the fermentation stage is over, the inoculated host can be dried, packaged, and stored for long periods. Though this is a simplified version of a process that requires several steps, it does describe what we buy when we buy Bokashi.
The bacteria belong primarily to three strains: yeasts (Saccharomyces spp.), bacteria that produce lactic acids (Lactobacillus spp.), and (phototrophic) purple non-sulfur bacteria (Rhodopseudomonas spp.).
These, or bacteria like them, are the active organisms in yogurt and in silage, the fermented hay that is produced all over the world as livestock feed. All smell sour or fermented but none produce a smell nearly as foul as those associated with natural anaerobic processes.
Where Does Bokashi Come From?
Bokashi was first developed by Dr. Teuro Higa, a professor at the University of Ryukyus, Okinawa, Japan, in the early 1980s.
An article by two Hawaiian horticulturists aptly named How to Cultivate Indigenous Organisms, describes how to find and cultivate the sorts of micro-organisms used in EM — in other words, how to create one’s own Bokashi inoculant.
This inoculant consists of either wheat germ, sawdust, or wheat bran combined with molasses and effective microorganisms (EM).
According to the authors of that document, Hoon Park and Michael W. DuPonte:
“In Asian countries, including Korea, deliberate collection and culturing of naturally occurring soil microorganisms has been a common agricultural practice for centuries, and application of these cultures to crop soils is believed to minimize the need for applications of inorganic soil amendments”.
The process they describe was common on Korean farms. This suggests that Higa’s contribution may have been the isolation and culturing of particular strains of bacteria rather than the entire process itself. The literature produced by Bokashi companies is rather vague on this point.
Despite its roots in traditional practices, here in the west, Bokashi is the new kid on the home composting block. To a large extent, it has yet to prove itself.
While there’s a huge body of independent scientific work establishing the many virtues of both regular compost and of vermicompost, no such body of work yet exists for Bokashi.
To a large extent, its virtues are still being touted by the people who developed it in the eighties and who are marketing it today. Most of the studies cited by these companies, especially by the U.S. company with close ties to Higa, appear to have been presented exclusively at the conferences his group sponsored and to have been published exclusively on his websites.
However, there have been several articles in the popular press and numerous testimonials in composting blogs.
How to Use Bokashi?
While the most common use for Bokashi is as an inoculant in anaerobic composting, it can also be added to an aerobic compost pile, added directly to soil, or used to create compost tea for watering plants.
Let’s look at exactly how you can get started with Bokashi, including how to maintain it and troubleshoot it for any potential issues:
How to Get Started with Bokashi
Bokashi is probably one of the least expensive composting systems around. A commercial Bokashi Bucket consists of a five-pound plastic bin with a tight-fitting lid on top and a spigot near the bottom.
This may seem a bit steep at almost fifty dollars, but that spigot might be the difference between a process that’s easy and one that’s unmanageable.
The leachate (liquid) needs to be poured off and lifting a five-pound bucket full of soggy food scraps, and its run-off is beyond many. A kitchen baster might be useful for this otherwise messy process.

A BESTSELLER!
Bokashi Bran
This all-purpose starter mix (activator) is inoculated with beneficial microbes.
$14.95Learn moreThe only other equipment required is the Inoculated Bokashi Bran; a bag of it usually comes with the initial purchase and 2-pound replacements cost about fifteen dollars each.
How to Bokashi Compost Step by Step
The process itself is about as simple as it gets.
Perhaps once a day you mix your kitchen waste (including meats and dairy products!) with a layer of Bokashi bran (basically enough to coat it lightly), then press it into the bin, sprinkle bran over them, and close the lid.
Place a plate or a layer of plastic over the pile to help seal it against the little air left in the bucket. Large bones will not, of course, disappear over the course of ten days.
It’s recommended to cut up small bones and even chop other items into small pieces for maximum efficiency.
If one chose to skip the chopping step, a few extra days’ fermentation time would probably reduce the larger pieces to thoroughly fermented mush. You should add up to 2 tablespoons of bokashi bran for every couple of inches of food waste until the bin is full.
When the bin is full, cover it tightly and set it aside somewhere in the house where it’s out of direct sunlight for ten days or so. Every other day, draw off the liquid (bokashi tea), which can be used as a fertilizer (in a very diluted form) or full strength to control slime in drains, pipes, and septic systems.
After ten to fourteen days, the waste in the tub should be pickled thoroughly. It can then be dug into a fallow patch of the garden.
How to Maintain Your Bokashi Properly
Bokashi is an anaerobic fermentation process. It needs to be kept as free from oxygen as possible.
It’s important, therefore, to compress each day’s waste flat into the container to eliminate any air pockets and to avoid stirring up the previous day’s waste when putting in new garbage.
Some recommend using a plate to press the foodstuffs flat in the composter. Leaving the plate in place protects the surface of the compost from any air in the composter.
Drawing off liquid regularly helps maintain the environment needed by the bacteria that break down the organic materials. That liquid needs to be used within a day or so.
Troubleshooting Bokashi Issues
As usual, foul smells indicate that something has gone awry. This diagnosis is a bit trickier than usual because Bokashi does not smell like spring roses even at the best of times.
The literature talks about the difference between a “sweet and sour odor,” indicating fermentation, and a “foul odor,” indicating decay.
Bokashi should not smell like other sorts of anaerobic decay because the inoculating microbes — yeasts, producers of lactic acids, and others — do not produce the sulfuric acid that gives outdoor anaerobic piles their characteristic stench.
It’s okay if there’s white mold in the bin, but if blue, black, or green molds appear, something may have gone wrong, and decay may have occurred.
If decay does occur, it can sometimes be reversed by adding more Bokashi. If this doesn’t work, it’s time to dump that batch, scrub the bucket, and start again.
What to Do After the Fermenting Process
The statement that the Bokashi mixture can be dug into the garden after fermenting for ten days shouldn’t be confused with the statement that the mixture is done.
This description of the bin refers to what’s produced in two weeks as ‘pre-compost.’ Plant roots should not touch it directly for a week or two as it’s too acidic at this stage. Only after a month can it be fully incorporated into garden soil.
Other Ways of Using Bokashi Compost
Some people feed pickled Bokashi material to their vermicomposting worms, apparently with no problems. Given how acidic the Bokashi process (and product!) are and how sensitive worms can be to acidic environments, it may seem surprising that the worms do not react to fermented feedstock, but apparently, it’s not a problem.
Others put Bokashi pre-compost into their regular composting pile. In gardens, one must remember not to plant anything where the Bokashi was buried for at least two weeks.
Burying it in the compost pile eliminates this need. It also solves the problem of finding fallow space in small gardens.
While it might seem pointless to use the Bokashi method if you’re just going to throw the stuff on the compost heap anyway, this objection misses an important point: while the material that goes into a Bokashi bin would take months to compost in an outdoor pile, the pre-compost breaks down completely in about a month.
The acidic nature of Bokashi means that one should keep an eye on the pH of the pile, especially if one is adding Bokashi frequently.
How to Brew Your Own Bokashi Tea
Bokashi tea, aka Bokashi juice, is full of nutrients that improve nitrogen in the soil, thereby increasing plant yields, and is great for houseplants.
The traditional process requires burying boxes of rice and monitoring fermenting liquids with a thermometer. The recommended host — wheat mill run — is not something that everyone keeps at the back of the pantry.
Just about everyone has old newspapers, however, and these are the host recommended by most experts. Indeed, that version is much simpler all around, requiring no special tools whatsoever and working only with liquids until the newspapers are introduced.
The entire operation can be carried out in the kitchen. So while the traditional process can claim romance, experts describe the process as remarkable for its simplicity.
Neither process can be carried out in the afternoon. Any process that gathers, cultivates, brews, and inoculates indigenous organisms is a multi-step process requiring long waits between each step.
As an example, here’s a summary of the procedure described by Bokashi Composting:
- Capture organisms: wash a cup of rice, save the water, and set it aside for about a week;
- Make serum: add milk to the water; set it aside to ferment for two weeks.
- Strain the solids off; mix the inoculating liquid (1 part serum, 1 part molasses, 6 parts water.) Soak newspapers, drain, and seal in a plastic bag. Let ferment for two weeks.
- Separate the newspapers and let them dry.
At this point, you’re ready to set up a Bokashi bucket. Nothing about this process is difficult; none of the steps take much time. Even with all the waiting for the various fermentation stages, the entire process takes on the order of five weeks.
Efficient and easy to use! The composting bins and supplies available at Planet Natural will reward you with piles of rich organic matter to use in your yard, garden, or houseplants.


