General Care
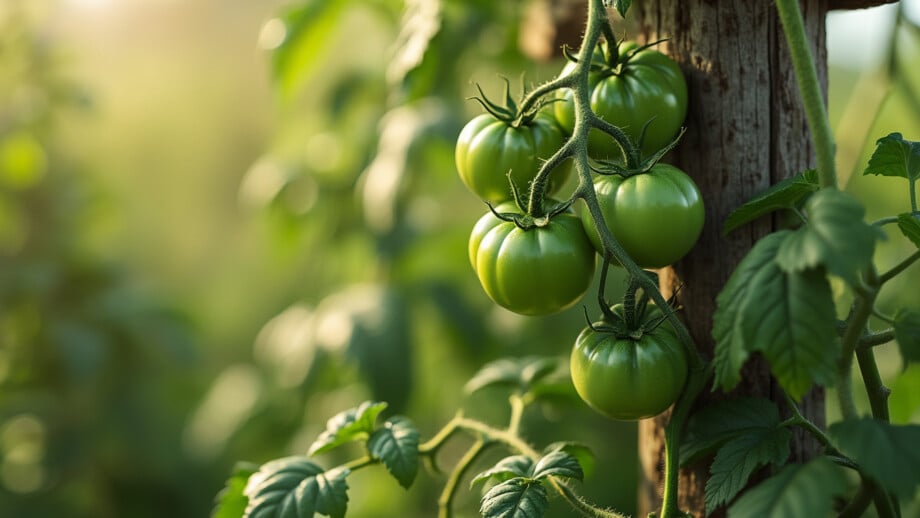
Tomatoes need early starts, long seasons, special feeding, vine support and your best care. Learn what it takes to grow a killer tomato here.

Wall O’ Waters
Available Here
Wall O' Water
Start tomatoes and peppers 6 to 8 weeks earlier without fear of frost or freezing.
Learn moreWatering
Water often and deeply, soaking the soil six to eight inches deep at least twice a week. Tomatoes do not respond well to letting the soil dry out between waterings. Keeping moisture levels in the soil even will help prevent the dreaded blossom-end rot, that small black spot on the bottom of the tomato which eventually can spread throughout the fruit.
Mulching
A layer of mulch (straw, plastic, grass) will help conserve soil moisture during the hot, dry days of July and August. In addition to moisture, tomatoes need warm soil. Black or red plastic mulch will work wonders if you live in a land of cool summers. For people in warmer climes, straw or another organic will be your mulch of choice.
Using the right gardening products makes growing easier and more successful! At Planet Natural we stock everything you need; plant ties for securing stems and vines, frost protection to extend the season and hand tools for making short work of those big jobs.
Note: There has been quite a buzz lately over using red plastic mulch to improve tomato yields and reduce the number of days to harvest. Early research, conducted by the USDA and Clemson University, found that tomato plants grown over red mulch produced about 20% more fruit than those grown over black plastic. Another study conducted by Montana State University found no difference in the color of mulch used and total yield, but did show that red mulch hastened ripening. Many other studies have been performed to determine the benefits of red mulch … all with varying results. It’s our opinion, that if you’re out to grow the best tomatoes in the neighborhood, then it’s probably worth a try!
Fertilizing
The numerical formula that appears on just about any fertilizer refers to the percentage of the three macro-nutrients in that product. A box that reads 5-3-4, for instance, contains 5% nitrogen, 3% phosphorus, and 4% potassium. Nitrogen is most important in nourishing foliage, phosphorus in promoting the growth of flowers and fruits, and potassium in building strong stem and root systems.
Tomatoes are wild about fertilizer. In gardening parlance, they are “heavy feeders,” meaning that they require a lot of nutrients. Fertilize one week before as well as on the day of planting. They especially love phosphorous, which promotes the formation of blossoms and the fruits or vegetables that grow from them. Avoid high nitrogen when your tomato plants have blossoms as it promotes vine growth rather than fruit growth.

A FAVORITE!
Organic Fish & Seaweed (2-3-1)
Use on a regular basis for bigger crops, increased sugars and better blooms.
Learn moreNeptune’s Harvest is a top-selling Fish and Seaweed Fertilizer that uses North Atlantic ocean harvests and gets great results from gardeners. They’re reporting bigger crops, increased sugars and better blooms.
A note also about what it means for a fertilizer or soil amendment to be “organic”: strictly speaking, a number of soil additives frequently referred to as “organic” are actually inorganic. Gypsum, lime, and greensand, or for that matter sand itself are all rock products and not, chemically speaking, organic, since carbon is not their primary component. However, the term “organic,” in casual gardening parlance, doesn’t refer to the chemical composition of a material, but to how much processing it has undergone, how toxic it is to the earth, its animals, and to humans, and most specifically, whether it is derived from petrochemicals such as oil. All of the additives recommended here have undergone minimal processing, are non-toxic to the earth and its inhabitants, and are not derived from petrochemicals.
Liquid Fertilizer: Organic liquid fertilizer, whether applied to foliage or to soil, has the advantage of being available immediately for plant use. If your plants are in dire straits, reach for the liquid. However, soil applications tend to leach quickly, so applications must be repeated fairly often, every one to three weeks.
The idea of applying fertilizer to foliage may seem odd, but it is gaining increasing acceptance as botanists and horticulturists become aware of the central role foliage uptake plays in plant nutrition. Most organic gardening stores can supply spray fertilizers which are usually a form of fish emulsion. They may not smell great that first hour after spraying, but they surely do work. One warning: they need to be applied in morning or evening, when plant pores are open and receptive. If you spray at noon, you are wasting your time and your money, not to mention your fish emulsion, because foliage pores close to protect the plant from drying out during mid-day heat.
If you have poor soil, plan on giving your plants one cup of fish emulsion mixture weekly until their first blossoms appear. Once blossoms appear, water your plants with compost tea or watered down fish emulsion every two to three weeks.

OMRI LISTED
Bloom Booster (3-9-4)
Promotes MAXIMUM blooms and strong root development in flowering plants.
$13.50Learn moreIdeal for ALL flowering plants! Dr. Earth® Bud & Bloom Booster is a handcrafted organic fertilizer used to promote MAXIMUM blooms and strong root development. Each 4 lb bag feeds 80 one-gallon plants or 16 five-gallon plants.
Slow-release granules: Organic dry fertilizers composed of natural and organic materials can be used as part of soil preparation or scattered on the surface under and beside already-established plants. Use these several weeks after planting for a slow, steady supply of nutrients. For young plants, use a balanced ratio (3-3-3 for instance) of nitrogen, phosphorus, and potassium, or even a compound that’s heavier on the nitrogen, as lush foliage will support the development of fruit. Once blossoms start appearing, the plants should receive less nitrogen and more phosphorus, which aids in the formation of blossoms and fruits.
A granule (or other fertilizer) marked 3-3-3 contains only about 10% in key, major nutrients, but you are not being cheated. Most organic compounds contain numerous other trace minerals besides the three major ones. Furthermore, the inert components in the granules aid in creating good soil texture and ensure that nutrients are released at an appropriately slow rate, to avoid “burning” or other plant damage.
Top & Side-dressing: Side-dressing means digging material into the soil around the plant. To avoid disturbing roots, be careful not to dig too deeply! During the blossom stage, side dress with a calcium source such as agricultural gypsum to prevent blossom-end rot. Crushed eggshells would seem to be an obvious and excellent source of calcium, but alas, they need to decay for several years before that calcium becomes available to plant roots.
Top-dressing is even simpler; this involves just putting the fertilizer on the surface of the soil. Compost is the easiest soil amendment to use this way; watering will carry nutrients down into the soil, as will earthworms, which concentrate and enrich it. Compost can also act as the medium for other fertilizers. Rather than spread bone or blood meal on the surface of the soil, mix them with compost; they will then be moved into the soil with the compost. It is a good idea to top or side-dress with two inches of compost or drench your plants with fish emulsion or compost tea in late summer.

Consider a Cover Crop: The United States Department of Agriculture says it knows the secret of “power” tomatoes, those large, juicy specimens which are the envy of all tomato growers. The government agency has published a 24-page paper — available for download at its Web site — entitled “Sustainable Production of Fresh-Market tomatoes and Other Summer Vegetables with Organic Mulches.” As its title implies, it advocates using a cover crop to protect and nurture your tomatoes.
Most of us associate cover crops with full-scale farms, not with back (or front) yard tomato gardening. But don’t let that term “crop” fool you; cover crops work as well on a four-by-four plot as they do in a field of several acres. They just require less seed at planting time, and perhaps a machete rather than a machine for mowing. All that’s involved is growing something valuable for what it does to or on the soil, rather than for what it produces.
Cover crops are used to prevent several problems: soil erosion during the off-season, weeds during the growing season, and soil depletion any time. Dense root growth holds earth in place, thus preventing erosion, while dense foliage above ground crowds out weeds, acting as a mulch even after it is cut. Good cover crops add nutrients in two ways: first, that cut vegetation, left in place, will decay and compost, adding biomass to the soil. The second process, known as “fixing nitrogen,” involves capturing nitrogen from the air and storing it in root nodules, thus making it available to other crops after the cover crop is cut or mowed. This process is performed by members of the legume family (consisting of peas and beans), so most cover crops are members of this family. Read more about the benefits of cover crops here.

#1 TOMATO BOX
Earth Box
A grow-anywhere planting kit that includes strong casters so it can be easily moved.
Learn moreNeed a tiny growing area? Earthbox® Organic Ready-To-Grow Garden Kit has the solution. This grow-anywhere tomato planter, complete with fertilizer and dialed-in watering system will have you growing veggies, herbs, flowers and fruits quickly and easily.
Cover crops are often grown on a field that lies fallow for a year, and are plowed under when mature to speed the composting process. They can also be grown after the main crop is harvested in the fall, and cut the following spring just before the field (or garden) is replanted with a main crop. This is the use that might be helpful to the back-yard tomato grower. The idea, then, is to plant a fast-growing nitrogen-fixing crop that sprouts in the fall, dies back during the winter, and resprouts in the spring.
The USDA recommends taking four criteria into consideration: winter-hardiness, efficiency in fixing nitrogen, efficiency in creating bio-mass (in other words, the ability to grow big, fast), and suitability for your climate. Some possibilities include big flower vetch or crimson clover followed by common vetch, subterranean clover, arrowleaf clover, and Austrian winter pea. But there was a hands-down winner in the government’s tests in Maryland: hairy vetch.
Hairy vetch was found to be the “most adaptable” and to yield “consistently high amounts of nitrogen and biomass.” Not only did it fix enough nitrogen to sustain tomatoes without other additions, it also provided the other two main plant chemicals, phosphate and potassium, in significant quantities, as well as a number of micronutrients.
To establish a cover crop, prepare your seedbeds in late summer. You want to get your cover crop established about two months before winter sets in. The USDA says to form permanent beds that can be used for more than one production season. Seed each bed with the winter annual crop.
Hairy vetch will start emerging about a week after you plant it. The seedlings will grow to five to six inches high and will form a ground-covering mat before the first snow hits. When subfreezing temperatures become the norm, the plants will turn purple and die back, but as soon as spring comes, they will resume growth. By the time it’s warm enough to transplant your tomatoes into the ground, the vetch plants will be about four to five feet in length.
Allow the cover crop to grow until right before you begin planting tomatoes. Before you put your tomato plants into the ground, you’ll need to convert the cover crop into mulch by mowing or rowing. For mowing, you’ll need to cut the plants two to three inches above the bed surface.
If you live in a warm area, once your vetch is mown, plant your tomatoes right through it, leaving the cut foliage in place. If you’re in a cooler area, remove and compost the cut stalks, as they will insulate the soil if left lying, preventing it from warming. Alternatively, leave them in place and cover everything (except the tomato seedlings) with clear, red or black plastic, which will speed both the warming of the soil and the decay of the cuttings.
Pruning
Pruning involves removing suckers, the volunteer sprouts that develop right where a leaf stem meets the main plant stem, at what’s known as the axial. Left to themselves, suckers will produce leaves, blossoms, fruit — and more suckers. A popular but somewhat old-fashioned school of thought holds that these secondary (and tertiary) sprouts “suck” the life from the plant, and that all should be removed. Actually, allowing some suckers to remain will increase your overall yield. If, however, you’re going for sheer size of individual fruit, then removing all suckers will help.

QUICK & CLEAN
Fiskars
Comfortable Softgrip handles reduce stress and are non-slip for added safety.
$13.95Learn moreSuper sharp blades give you the control you’re looking for! Fiskars® Pruning Snips with easy-open spring action reduce hand stress while trimming. Perfect for deadheading or shaping plants.
Whether and how much to prune depends on how you plan to support your tomatoes. Trellised tomatoes require the most radical treatment, with staked tomatoes next. In both cases, the support system can’t handle more than a couple of stems laden with heavy fruit. Caged tomatoes are generally pruned down to four or five producing stems, though Charles H. Wilbur, he of the 25 foot-tall tomato plants, goes for 18, one tied to each vertical wire of his homemade tomato cages.
Advice on pruning tomatoes abounds. Missouri State University recommends keeping the sucker that develops immediately below the first bloom cluster, and one sucker below that. Remove all the other suckers as you tie the plants and then remove additional suckers as they develop.
Training and Supporting Tomatoes
No, we’re not talking obedience training or getting tomatoes to jump through hoops. Nor do we recommend talk therapy for tomatoes. Training or supporting tomato plants means using stakes, cages, trellises or other support devices to keep their fruit off the ground and reduce rotting.
Why can’t tomatoes hold up their end of the stake? It would appear that tomatoes have a serious identity problem: they’re the vegetable that is actually a fruit, and the bush that is really a vine. Most of us don’t think of tomatoes as vines, but technically they are, even if they don’t twine winsomely round the nearest vertical support. Like most vines, they don’t put a lot of energy into developing sturdy stalks, so if you don’t want your tomatoes to sprawl, you’ll probably have to support them with wooden stakes or metal cages (see My Name is Tom and I’m Indeterminate).
Unsupported tomato plants can be healthy and can produce prolifically, but they are vulnerable to several drawbacks. They take up far more space than their supported cousins, and the fruit that lies on the ground is an easy target for slugs, fruit rot, sunscald, and other problems.
Finally, there is the aesthetic consideration: Like urban sprawl, tomato sprawl can be considered unsightly, and may invite objections (even petitions) from your neighbors. Moral: Support Your Tomatoes Today!

Hydroponically grown tomatoes supported by a trellis system.
Stakes: Requires wooden, bamboo, or metal stakes. The stakes are normally five to six feet long for indeterminates and shorter (three to four feet long) for determinates. The stakes should be at least one-inch square if wooden, slightly smaller if made of metal. Do not use chemically treated wood for stakes (or for raised beds, cold frames, etc.; the chemicals can leach into the soil, be taken up by the tomatoes, and passed on to the consumer, i.e. you.) Concrete reinforcement rods, known as re-bar, are great for staking tomato plants. Space plants 18 to 24 inches apart in rows. Drive a stake next to each plant or every other plant. The stake should be placed three to four inches from the base of the plant on the side away from the first bloom cluster.
Staked tomatoes are usually pruned, since a single stake can’t support the many stalks an unpruned tomato will develop. There are different methods of tying tomato plants. Anything strong and soft will work — strips of old sheets or T-shirts, bits cut from row covers, even old panty hose cut into strips. Any of these will help support the plant without bruising the stalks. You can also buy commercial plant ties if you’re not on a budget. If you use something thin like twine or twist-ties, you need to check occasionally that it isn’t cutting into the stalk, or that the stalk, especially as it grows longer, doesn’t just keel over and hang from the highest tie. You can avoid such problems by adding ties as the plant grows, being sure that there is always a tie above the most recent fruit cluster.

PERFECT FOR VINING PLANTS!
Tomato Clips (100pk)
Use to improve air circulation and reduce disease in tall crops or vining vegetables.
$14.95Learn moreReusable Tomato Vine Clips make it easy to tie plants to stakes, trellises or support wire. Works with stems up to 3/4″ in diameter and features open sides to improve air circulation and reduce disease problems.
Whatever method you use, don’t depend on a single tie for an adult plant. Ties can slip, letting the weight of the plant bow the stalk away from the support, leading to a damaged or even snapped stem. Never tie a plant immediately below a fruit cluster because the weight of the fruit may cause the plant to sag and strip the cluster from the plant. Prune and tie the plant as it grows.
Cages: Concrete reinforcing wire makes great cages. Caging is also less work than staking tomatoes or training them to a trellis. There’s no tying and less pruning. According to Montana State University (MSU), a five-foot length of 10-guage reinforcing wire with six-inch openings will make a cage about 18-inches in diameter. Make cages at least five feet high for indeterminates. Set your tomato plants three feet apart in a row and place a cage over each plant. Anchor the cage by pushing its bottom into the ground. If you need to protect young plants from cold and wind, wrap the bottom 18 inches of each cage with clear plastic. As plants grow, turn the ends of the branches back into the cages.
If your tomato outgrows its cage and decides to start growing down instead of up, don’t instantly reach for the pruning shears or a longer support pole. Many tomato plants grow to the top of their cages and then droop down over them and continue to produce. Remember that these are vines. If a major stem develops a kink that looks like trouble and you’re trying to keep your plant on a vertical track, try splinting it with a stick and several twist ties, and stake the stem securely along its whole length. You can extend cages either by adding wire on top or by setting long stakes inside them.
Trellises: Only use with indeterminates. Trellised plants are always pruned back to only one or at most two main stems, so this method isn’t appropriate for determinates, which need their full complement of stems. Plants should be about one foot apart. Prune just to the main stem and remove all suckers as they develop. Build a simple garden trellis by setting at least four vertical support posts in the ground at the length and width you want. The top of the posts should be about six feet above the soil surface. With strong twine, tie the vertical posts directly across from each together to form a teepee shape. Use more twine to attach horizontal rails to each side of the vertical posts. Add another horizontal rail into the crossed pieces at the top of the trellis, and secure. As the plants grow, wrap them around the rails for support or carefully tie them to the trellis.
Extending the Growing Season
You can’t change what weather Mother Nature throws at you, but there are ways and ways to handle it.
Spring — Starting early (seedlings, protection)
Getting an early start is one of the key ways to make the most out of warm weather when it does come. If you’re starting from seeds, and you wait till it’s actually growing season to plant them, you’ve lost close to two months. If you’re using seedlings, buy them early enough to have a good selection, and then care for them well.
You can transplant outside early if you protect the young plants from cool weather. Greenhouse kits will of course give the most protection, but there are several options short of those. The simplest, and one of the best tools for extending the growing season, is to use floating row covers. These come in several different weights, and they work whether you’ve got twenty-foot rows, a few plants in a single plot, or individual plants in barrels or other containers. These thin sheets of cotton or polyester can protect frost-sensitive plants down to 28˚F.

#1 FROST FABRIC
N-Sulate
Start planting earlier in the season for a longer flowering and growing period.
$14.95Learn moreN-Sulate® is a premium-grade frost fabric that can be draped directly over the plants or over hoops above them. Then, they can be tucked into the earth, or anchored using staples (or a rock or old brick or two.) The big advantage of hoops is that they keep the cloth from touching the leaves. In very cold weather, leaves in contact with the fabric can be damaged before others. Another tactic is to use two layers of fabric. This creates an insulated layer of air between the two layers.
Be aware that tomatoes grown in containers are especially vulnerable to cold, because air, which cools faster than the ground, surrounds them. If you suspect a real cold snap, it’s best to surround pots and planters with some sort of insulation — straw, leaves, old blankets, anything that will block the easy flow of cold air. Even setting them under a hedge will provide some protection.
Fall — Ending late
When the days get shorter and colder, prune leaves from your tomato plants to help warm sunshine reach the ripening fruit. Sun light doesn’t help tomatoes ripen, but its warmth does.
Everything about row covers and protecting plants from frost applies to extending the season into the fall, except that you are now dealing with large, mature plants, rather than young seedlings.
When, despite your best efforts, the end of the season is in sight, prune off all flowers that have not set fruit, and water with dissolved epsom salts to encourage the remaining fruit to ripen. Another way to signal “it’s autumn” to your tomato plants is as follows: Set a shovel about one foot from the stem of the plant, and stamp it straight down into the earth, severing the outer roots. Do this in about three places around each plant or, in urgent cases, all the way around. This deprives the plant of some water, and will further shock it into making suitable preparations for winter– ie, ripening its fruit.