
Propagating plants is an inexpensive and easy way to get new plants from plants you already have. This asexual means of reproduction produces a plant that is genetically identical to its parent.
There are a variety of plant propagation tools and methods; from taking cuttings to layering to dividing and more. The technique you select will depend on the type of plant you wish to propagate and the amount of time and effort you want to put into it.
Cuttings
One of the most amazing things about plants is that every cell has the ability to duplicate all parts and functions of the plant. By taking a cutting of a leaf or stem and creating the right conditions, you can create an entirely new plant (see Plant Anatomy Basics).
Start with a stock or “mother” plant that is in great health and has plenty of stems, so that if one is removed, it will not harm the plant.

#1 CLONE MACHINE
EZ Low - 128 Site, White
The low-profile design allows the unit to operate using less water in a smaller space.
$459.95Learn moreNow you can enjoy growing indoors all year long! At Planet Natural, we’ve carefully selected only the best indoor gardening supplies — from lighting and hydroponics to starter plugs and growing mediums — to make your indoor growing experiences blossom.
Stem Cuttings
Propagation by stem cuttings is the most popular plant propagation method for woody shrubs and ornamental plants. This is also a good technique for houseplants. (Learn about Indoor Plant Care here.)
Houseplants are often quite easy to propagate. Look for a healthy stem absent of flower buds, disease and insects. Using a sharp, sterile knife make a clean cut at a 45° angle to maximize the rooting area. Cuttings should be about 3-6 inches long (shorter if the plant is small) and include the tip of the stem, and at least two or three sets of leaves attached.
Remove the bottom set of leaves (new roots will often develop from this area) and dip the end you just cut into rooting gel. This will help seal the cut plant tissue and promote new root growth (optional). Then place the cutting into a small pot with moist vermiculite, perlite or other soilless potting mix. Be sure to poke a small hole in the growing medium before placing the cutting into it. This way the rooting solution won’t rub off of the stem.
Keep your new plants warm and in bright light, but out of direct sunlight. Many cuttings will also benefit from added humidity. To increase moisture and create a mini-greenhouse effect, place the pots in a clear plastic bag. Do not let the plastic you use to cover the pots touch the cuttings. Mayonnaise jars, milk cartons, and plastic soda bottles can also be used to cover cuttings.
Once the cuttings have developed roots — this can take a few days or a few months — replant them in another container with moist, but not wet, potting soil. (To identify whether roots have formed or not, pull lightly on the plants. If they pop right out, they are not ready. If you feel some resistance, go ahead and repot.)
Until the new plants have become fully established, carefully monitor the amount of moisture and light they get. Remove dropped leaves and diseased plants from the area as soon as they are noticed to keep fungus from spreading to healthy plants.
Softwood stem cuttings are taken from new branches of shrubs that have not yet become woody (see Propagate Your Shrubs from Softwood Cuttings). The term “softwood” describes the stage of growth on a deciduous woody plant that isn’t brand new (green), nor is it fully mature (woody). It is somewhere in between the two. (Try bending the branch. If it snaps easily, it is ready to go. If it is very flexible and just bends, it is too young and will most likely rot before rooting. If there is no flexibility at all, it is too old and will be very slow to root.)

ROOTING GEL
Clonex Gel
Seals the cut tissue fast and supplies the hormones needed to promote fast growth.
Learn moreA high performance rooting compound! Clonex® Gel will remain in contact around the stem, sealing the cut tissue instantly and supplying the hormones needed to promote root cell development, and vitamins to protect the delicate new root tissue.
The best time to take softwood cuttings is from April thru June after it has rained (or you’ve watered). Look for healthy shoots that aren’t too thick or too thin. Using a sharp knife or pruning shears, cut a 2 to 10 inch section of stem at least 1 inch below a leaf node, and including 2 or 3 pairs of leaves. Make a diagonal cut; the larger the cut, the more surface area for roots to develop.
Tip: Dip pruning tools in a mixture of 1 part bleach to 9 parts water to prevent transmitting diseases from infected plants to healthy ones.
Place the cuttings in a container with wet paper towels to keep them moist until you can get to the house (or your potting bench) to plant them. Be sure to take more cuttings than you think you’ll need, as they likely will not all root.
Remove the lower set of leaves, and if you are extra motivated, scrape a little bark from the end of the cutting. Dip the cutting into water and then into rooting hormone, being sure to cover the wounds left by the removal of the leaves.
Note: Using rooting hormone is more important with softwoods than with houseplant cuttings.
Plant cuttings into pots filled with a soilless potting media just deep enough to support the stems and hold them upright. Do NOT use garden soil as it will remain too wet, causing the cutting to rot before rooting.
Recipe: Soilless Mix for Rooting CuttingsThis soilless mix is ideal for rooting cuttings, but should be replaced with a richer potting mix once they show signs of growth. Ingredients:
Combine all ingredients with a small amount of water and mix thoroughly until evenly moist. A light solution of organic starter fertilizer or seaweed extract can be added to this recipe. |
After the cuttings are planted, you can trim the leaves to about half their size. They’ll still be able to photosynthesize light, but won’t lose so much water through transpiration.
Place the containers in a plastic bag to raise the humidity level around the cuttings, or purchase a misting system to keep your new plants adequately moist. After about 6 weeks check to see if roots have formed. If the containers you are planting in are small you may notice roots protruding through the drainage holes. Otherwise, give the plant a gentle tug. If the plant pulls right out it isn’t ready — replant it. It you feel resistance, it’s ready to be repotted.
Note: Because soft stem cuttings are taken from young plant tissue they form roots relatively quickly. However, they require high humidity levels to keep from drying out.

STARTER CUBES
Rapid Rooter
The optimal air-to-water ratio within the plug matrix causes explosive root growth.
Learn moreGerminate seeds or start plant cuttings — fast! General Hydroponics® Rapid Rooter contains a superior matrix of composted organic material bound together by plant-derived polymers. Ideal for ALL soil and hydroponics applications.
Transplant your tiny new shrubs into larger pots with a mixture of 80% organic potting soil and 20% perlite. Water with an organic liquid fertilizer that is seaweed or kelp-based. Slowly “harden off” plants before transplanting outside. Learn how to harden off plants here.
Hardwood stem cuttings are taken after the plant tissue has grown woody and when the plant is dormant. The best time to take hardwood cuttings is late fall — after a killing frost — or anytime during the winter months.
Look for healthy, vigorous stock plants growing in full sunlight. Again, stems that are not too thin or too thick work best. A minimum girth of 1/4 to 1/2 inch and a length of 4-8 inches is recommended. Cuttings should be taken a few inches below the terminal bud. Use a straight cut on the top end of the stem, slightly above a bud, and an angled cut at the bottom end, just below a bud. Discard the tip of the shoot. Always take more cuttings than you think you’ll need as they may not all take root.
Note: There are three types of hardwood cuts: the straight cut, the heel and the mallet. (For a diagram of each see Plant Propagation by Stem Cuttings – Figure 3.) A straight, or simple cut, is used most often. The heel cut includes a small section of older wood and the mallet cutting includes an entire section of older stem.
Dip the cut ends in rooting powder and place the stems 2-6 inches apart in a container filled with a moist soilless potting mix. Plant the stems deep in the mix, so that only the top one or two buds are showing above the surface.
Tip: Make sure that the stems are planted upwards by burying the angled cut into the pot (the straight cut should be on top).
Water, cover with a plastic bag and place the cuttings in indirect sunlight. Rooting will occur more quickly if they are misted on a regular basis. Once plenty of roots and some top growth have developed, remove the plastic covering and transplant the young plants into a larger container or a protected bed. Do not plant directly in the landscape, yet, rather wait until early the following season when your plants are much larger and stronger.
Leaf Cuttings
Several herbaceous or woody plants, including many indoor houseplants, can be propagated from leaf cuttings. With this method, a leaf and its stem (petiole) or sometimes just a piece of the leaf are used to create an entirely new plant. The directions for propagation by leaf cuttings are basically the same as for softwood or hardwood stem cuttings and can be performed any time of year.

SEED STARTER KIT
Hot House
Get a jump on the season and grow bigger, healthier plants with Hot House!
$44.95Learn moreJump start your garden with the Hydrofarm® Hot House. Includes everything you need to get started, plus a tall (7.5″) humidity dome — with three adjustable vents — which is best for cuttings.
Select a healthy, full grown leaf from a vigorously growing plant and remove it along with about 1-1/2 inches of its stem. Dip the cut portion in rooting hormone and plant the entire stem (up to the bottom of the leaf) at an angle in a moist soilless rooting medium. After planting water thoroughly to settle the potting mix around the plant.
As with the other cutting techniques, place the container in a plastic bag to increase humidity and keep it in a cool place (about 70°F) out of direct sunlight. After 4-6 weeks new roots will form and the plant can be moved to a larger container.
Note: Many times several plants will grow from the same leaf cutting. Carefully separate these young plants from the “parent” leaf and transplant them into their own container.
Root Cuttings
Root cuttings are best taken when the plant is dormant and the roots are chock-full of carbohydrates.
Take 1 to 4-inch long cuttings from younger root growth that is about 1/4 to 1/2 inch thick. Cut straight through the end of the root nearest to the stem and cut the other end at an angle. This way you will remember which end is the top (the straight cut) and which is the bottom (the diagonal cut). Roots will not grow if you plant them upside down.
Store cuttings in a moist rooting medium at 40°F. After three weeks, remove the cuttings from storage and bury them upright under 2-3 inches of soilless potting mix. Place the container in a plastic bag and put the whole thing somewhere with bright, indirect sunlight. When roots become established and weather permits, harden the new plants off and transplant them outside. Learn more about transplanting and handling plants here.
Tip: If cuttings are from fine or small roots, simply scatter them over the surface of the potting mix and cover them lightly.

Layering
Layering is a way to grow new plants from existing plants without having to take any cuttings. In a nutshell, bury part of a stem or branch in the soil and new roots and shoots will form. This method is often more successful than propagating from cuttings, because the new plant can get water and food from the stock plant. Once the new plant is established, it can be moved to another spot in the garden.
Simple Layering
Most plants with low growing branches or stems, such as vines and woody shrubs, take well to simple layering. Use a dormant branch in early spring or a mature branch in late summer.
Bend a flexible, low-growing branch to the ground and place it in a small hole about 4-inches deep. Remove leaves and side-shoots from the portion of the branch that will be buried and cover it with soil. You may need to place a rock on top of the soil to hold the branch underground. It is important to leave at least 6-12 inches of the branch tip out of the soil and stake it upright to keep it growing straight — this will be the top portion of your new plant!
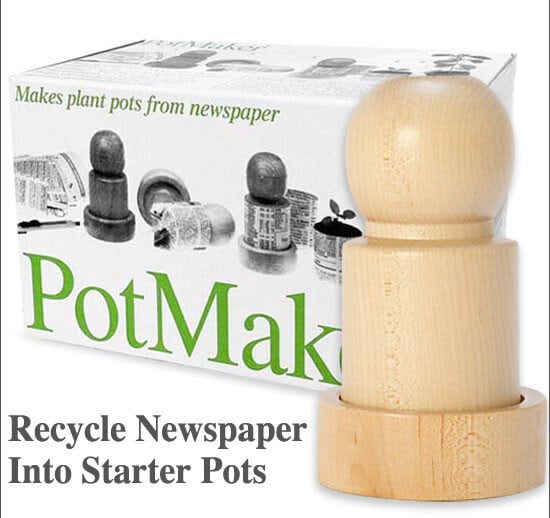
RECYCLED POTS
Pot Maker
Create your own 2 in. biodegradable plant starters out of recycled newspaper.
$19.95Learn moreRecycle old newspapers into ideal starter pots with this 2-piece Pot Maker. Easy to use, just roll and press — no glue required! When plants are large enough, plant pot and all into the garden.
Usually, the bend in the buried portion of the branch is enough to encourage rooting, but by scraping, or wounding, the bark on its underside, you can help speed rooting along. Keep the layered area moist and free of weeds and within a season or two a root mass will have developed. Cut the layered section from the plant and it’s ready for transplanting.
Tip Layering
Ideal for blackberries and raspberries, tip layering should be done in late summer and is a lot like simple layering. However, instead of keeping the tip of the plant above ground, you bury it in a hole 3-4 inches deep. At first, the tip will grow downward, but then it will make a sharp turn and grow upwards toward the sun.
In late fall or early spring, after roots have developed and new shoots appear, tip layers can be cut from the original plant and moved to a new area in the garden.
Compound (Serpentine) Layering
Compound layering involves burying several parts of one stem and works well with vining plants or plants with pliable branches. Bend the stem towards the ground as you would if simple layering, but alternately cover and expose sections of the stem. The end result should look like your stem is snaking its way through the soil.
Each section of the compound layer should have one bud exposed and another bud buried. Wound or scrape the bottom side of each covered section to promote rooting. Cut plants apart when they have developed roots and replant them early in the growing season.
Mound (Stool) Layering
If you have closely branched or heavy-stemmed shrubs and rootstock of tree fruits that you’d like to propagate, try mound layering. During the dormant season, prune the plant back to approximately 1-inch above the soil surface.
The following spring, the trimmed plant will produce new shoots. Cover these shoots with soil, creating a 7 to 9-inch mound around the stock plant. Roots will grow at the bases of the new, buried shoots. In the fall or following spring, carefully separate and transplant the newly developed plants.

POTS YOU PLANT!
CowPots
Winner of several gardening awards, CowPots are made by American dairy farmers.
Learn moreSay goodbye to plastic planters! CowPots are a revolutionary container made from composted manure. Best of all, this eco-friendly plant pot quickly bio-degrades after planting giving your garden a healthy kick-start with all the benefits of manure.
Air Layering
Air layering can be used on many larger houseplants, as well as woody ornamental plants, such as holly, rhododendron and lilac. For best results, start air layers in the spring on stems from the previous year’s growth or during the summer months on the current season’s growth.
Using an upper branch or stem, select a site just below a leaf node and remove the leaves and twigs both below and above that point for 3-4 inches. Scrape away a small area of bark, or make a cut about 1-1/2 inches long and 1/3 of the way through the stem. Apply a rooting compound, such as Clonex® to the exposed area to promote root production. Use roughly a handful of moist sphagnum moss to surround the wound and wrap the moss with black plastic. Seal the plastic on all sides with tape or twisty ties, making sure that the moss does not extend beyond the cover.
Once the roots are well formed (usually 1-3 months for houseplants; 1-2 seasons for outdoor plants) cut the stem just below the bag and pot the new plant as you would any seedling. After a couple of months the young plant should be hardy enough to transplant outside. Click on this link to learn more about air layering for difficult to root plants.
Divisions
Propagation by division is cutting or breaking up a group of suckers or a crown or clump into smaller segments. It is important that each plant segment has a bud or it will not propagate. Most perennials benefit from division as they get older and begin to lose vigor, plus you get more plants to spread around the garden or share with friends. While there are different techniques for dividing perennials, the general rules are the same.
Divide fall-flowering perennials in spring and spring-and summer-flowering perennials in fall. For fall division, plan to do it early in the season as the plants will need 4-6 weeks to become established before the ground freezes. In the spring, divide early. Plants will benefit from the cool, wet weather and be well established before the heat of the summer kicks in.
Two or three days before dividing a plant, water it thoroughly — this will help reduce the stress of division — then cut the plant back so it doesn’t lose too much moisture.

#1 MYCORRHIZAE
MYKOS
Works with any feeding program and increases plant biomass and yield by 300%.
Learn moreIncreases plant biomass and yield by up to 300%. Xtreme Gardening® MYKOS is a beneficial soil fungus that enhances nutrient and water uptake, encourages vigorous root systems and helps plants resist stress and disease.
Dig all the way around the perimeter of the plant and gently pull it out of the ground. If you find a huge root ball that you can’t lift, go ahead and cut it through the middle with your shovel. If the plant has a spreading root system, you can probably just pull it apart. Plants that have rhizomes (horizontal, underground stems), can be divided with a sharp knife.
Place the plant segments into a bucket of water right away so there isn’t a chance for them to dry out. While the plants are soaking, dig a hole at least as deep as the plant was originally set. Add peat moss, organic compost or aged chicken manure to give the plant a little edge as it gets established.
Settle the plant segment into the hole and fill with amended soil. Water well. Adding a thick layer of mulch will help the new plant through its first winter, but be sure to pull away some of the mulch in the spring to allow the soil to warm.
Bulbs and Corms
Plants that grow from bulbs can be propagated by taking small offsets or bulblets from the base of the parent bulb. Place the bulblets in light, rich soil and let develop for 2 or 3 years. The same procedure used for propagating bulbs works for plants with corms (see “What is a Plant Corm?“).
Another method that is popular for propagating non tunicate bulbs, such as lilies, is known as scaling. Pick a healthy bulb and trim off the old roots to prevent rot. Be careful not to damage the tough base of the bulb where the roots emerge called the basal plate.
Gently peel several of the outside scales away from the main bulb. Each segment should have part of the basal plate so new roots can grow. Toss out any pieces that do not have a basal plate.
Put the scales into a bag of moist, but not wet, vermiculite. Use a ratio of 4 parts vermiculite per scale. Leaving some air in the bag, seal it up and put it somewhere with a temperature of about 70°F. If you choose to use a fungicide, dust the scales before inserting them into the bag.
Check regularly for rot, and after 8-10 weeks tiny bulblets should be noticed at the base of the scales. Plant the scales 1/2-inch deep in a container filled with organic potting soil. Keep the plants in a warm, bright spot and make sure the soil stays moist. New leaves will shoot up in the spring. When these leaves die back at the end of the growing season, separate and replant the new bulbs.


