Planting & Propagation
“How could such sweet and wholesome hours be reckoned but with herbs and flowers?” – Andrew Marvel

Best product
for Rooting Cuttings
Clonex Gel
Seals the cut tissue fast and supplies the hormones needed to promote fast growth.
Learn moreOnce you’ve selected a location for your herb garden, you’ll need to figure out what varieties you want to grow and how you want to grow them. Keep in mind that almost all herbs can be planted from seeds. However, some herbs such as rosemary, mint and oregano do better as transplants or propagated by cuttings. Learn about the plants you intend to grow before planting and plan accordingly. On this page, I describe several planting techniques to ensure that your herb garden gets off to a terrific start.
Give your garden expert care from the very start. It’s easy when you have the right seed starting supplies from Planet Natural. We carry all the equipment you need to keep your young plants thriving.
Planting Herbs Indoors
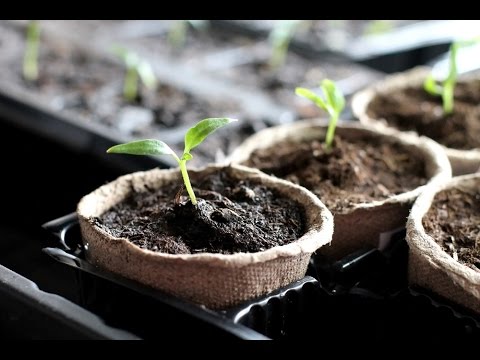
Starting herb seeds indoors is pretty darn easy if you know what you’re doing. Simply provide the right conditions and you’ll have beautiful, healthy seedlings in no time.
First, select a container that you want to plant in. You can use egg cartons, plastic seed trays or peat pots specifically made for seed starting or direct seed into a sterile growing medium like rockwool.
The benefit of using “biodegradable” containers, like CowPots, is that they can be planted along with the seedlings directly in the garden. As a result, the roots are not disturbed and transplant shock is greatly reduced. Plastic pots are preferred by some gardeners because they retain moisture more consistently.
Use a good quality potting soil when starting seeds. In addition to the soil, you may want to add a little sand to promote drainage. Fill the containers almost to the top with potting mix and wet it down so that it is moist, but not sopping wet. Insert the seed, or place it on top, covering it with a little soil. Very small seeds should lie directly on the surface. Check the back of the seed packet for specifics on planting depth.
Find a sunny, preferably south facing windowsill for your growing containers or put them on top of the refrigerator where it’s nice and warm. Germinating seeds prefer temperatures between 60 and 75°F.
After planting, cover with plastic wrap or put the whole container in a plastic bag. This will help retain moisture and promote successful seed germination. Check often to make sure that the soil stays moist, and remove the plastic wrap as soon as seedling appears.
Transplanting Herbs
If your seedlings have been properly cared for they should be ready to transplant in 5 to 10 weeks. Wait until all danger of frost has passed before moving them to your garden. You’ll also want to gradually “harden off” your plants. Start by bringing them outside only for short periods of time, perhaps for a couple of hours. Then slowly increase hours until they’ve acclimated to the elements and can be planted outdoors (see Hardening Off Isn’t Hard).

SEED STARTING KIT
Hot House
Get a jump on the season and grow bigger, healthier plants with Hot House!
$44.95Learn moreJump start your plants with the Hydrofarm Hot House. Offers increased growing success by providing gentle heat to the root zone and by controlling humidity under the dome. Easy to use — just add your own starter mix!
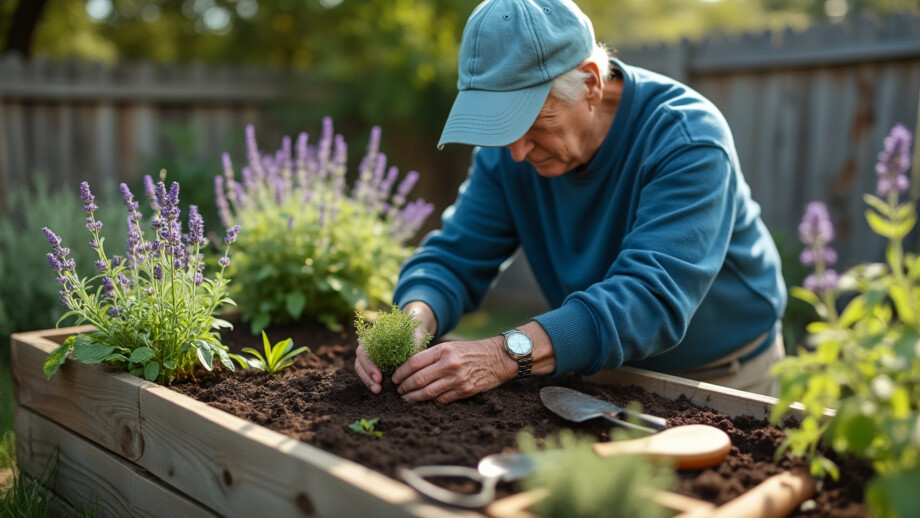
If you can, choose an overcast day for transplanting. If this is impossible, try planting seedlings in the early evening when the heat of the day has mostly passed. The goal is to keep your young plants as comfortable as possible and not to shock them in any way. Give them water an hour or two before transplanting and prepare the beds so that you can quickly move them to the soil. Loosen the plant from the container and place it gently into the hole. Make sure that the plants’ base is even with the ground and gently fill and tamp the earth with your hands. If your plants are in biodegradable pots you can plant them directly into the soil. Cut the sides of the containers so the roots can spread. Water gently.
Important: Some herbs do not transplant well and should be planted directly from seed in your outdoor garden. These include: anise, coriander, dill and fennel.
Direct Seeding
If you choose to plant seeds directly into the garden, do so after all danger of frost is past. Read the seed packet for specific planting directions (see Seed Packet Jargon). Use your hands or the corner of a trowel to prepare a trench for seeding to the depth you desire. Take a few seeds in your fingertips and scatter them down the trench trying to achieve the spacing recommended. (If necessary, mix sand with small seeds to make them easier to handle.) Don’t worry if you over seed – plants can always be thinned out later! Cover the seeds lightly with soil and gently water till wet.
Tip: If your garden is high in clay, cover seeds with vermiculite instead of soil. Clay naturally absorbs heat from the sun and could “cook” the seeds. Clay can also form a tough top crust that can hold back young seedlings.
Propagation by Division
When propagating from division, divide herbs in early spring before growth begins. Dig up a section of the roots from an established plant and cut or pull them apart into smaller clumps. Replant the divided sections in a new garden location, taking care to add plenty of compost to the planting hole. Set the sections at the proper depth and keep them moist until the new plants are established. Chives, mint, rosemary, tarragon, oregano, sage and thyme are all easily propagated by division.
Propagating From Cuttings
Take your gardening skills to the next level by growing your own plants from cuttings. Start with a plant that you really like. But be prepared, not every cutting you take is going to root – and that’s okay! Under ideal conditions a 90% success rate is considered excellent. For what it’s worth, lavender is one of the easiest plants to take stem cuttings from and is one of the most reliable ways to propagate this fragrant herb.
To begin, select a container that is well sterilized and about three inches deep. If you have the cash, those propagation trays found at garden supply stores work great and they can be used again and again.

#1 PLANT CLONING MACHINE
EZ Low – 32 Site, White
These smaller systems utilize the same high tech aeroponics as our larger systems.
$249.95Learn moreStart your own cuttings in days with the EZ CLONE 32 site aeroponic system! New improvements have created a cleaner, more efficient cloning machine that turns out robust specimens rapidly.
For cuttings, you want to use light soil or a soilless mixture. This can either be store bought, or, if you’re feeling industrious, you can make your own (see Indoor Plants – Soil Mixes). Perlite and vermiculite also work well. Whatever you decide to use, the mixture needs to be sterile and it has to drain really well. Root rot is not what you want here. Wet the medium before you set your cuttings; make it damp but not soaking.
Step by Step Instructions:
- Start by only taking cuttings from flourishing plants. They should be healthy, happy and raring to grow.
- Use a stem or branch that is coming from the side of the plant not the middle. For some reason, side shoots seem to root faster.
- Select a cutting that has at least 2 or 3 sets of branches on it and remove the lower 1 or 2 sets (stems and leaves). Also, remove any flowers or buds. What you want is enough leaves for photosynthesis to occur but not so many that the plant can’t concentrate on rooting.
- Make a clean 45 degree slice with a razor blade or scalpel at a node. (Leaf nodes are where the branches come out of the stem.) If you want to use a cloning gel* – now is the time!
- Take the cutting and quickly settle it into the growing medium making sure to keep the leaves from touching the medium.
- Cover with a plastic dome and provide bottom warmth from a heat mat at all times.
- Placing a T5 florescent light or grow light over them for about 12 hours a day will help immensely.
- Keep them moist and wait until roots appear. That’s it!
For more information on plant propagation by stem cuttings visit the North Carolina Cooperative Extension Service.
* Known and respected the world over, Clonex Gel seals the cut tissue instantly and supplies the hormones needed to promote root cell development, and vitamins to protect the delicate new root tissue. Easy to use, just dip the cutting and stick it into your rooting medium.