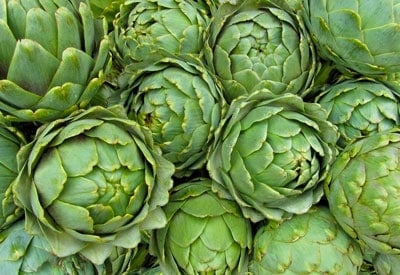
Native to the Mediterranean, globe artichokes (Cynara scolymus) require cool nights and warm days. Aside from providing delicious, unique finger food for the table, the plants themselves are beautiful! Artichokes grow up to 5 feet across and almost as high with beautiful silvery-green foliage and fragrant purple thistles.
The amazing artichoke offers a superb nutty flavor with several health benefits. Tender globes are packed with vitamins C and K, minerals and dietary fiber. Artichokes are on the USDA’s list of top antioxidant foods and are known for their cancer-fighting properties.
Fun Fact: Castroville, California is known as the “Artichoke Center of the World” and celebrates an annual festival for the vegetable. Marilyn Monroe was crowned Castroville’s first Artichoke Queen in 1947.
Quick Guide: Planting, Growing & Harvesting Artichokes
- Plant in quality soil that drains well
- Damp weather, with cool summer temperatures are best
- Fertilize early in the season; water regularly
- Pests include earwigs, aphids and slugs
- To harvest, cut fruit from plants

BUILD YOUR SOIL
Soil Amendments
Planet Natural offers the organic amendments that your plants need to thrive.
View allSite Preparation
Each spring, mix organic compost or pure forest humus into your garden plot (see How to Prepare Garden Soil for Planting). Artichokes require sandy, fast-draining soil and cool temperatures to thrive. They need regular water for an ample harvest, but if you just like the look of the plant and don’t want to eat these tender thistles, they will survive on very little water. Artichokes are susceptible to freezing and do best where the temperature remains constant year round.
How to Plant
For best production, sow artichoke seeds in the spring after frost danger is past, but before temperatures go above 50°F. Ideally, the seeds or seedlings should stay in this range for about 2 weeks. This special treatment encourages plants to produce more buds. After this stage, their ideal temperature range is between 55°F and 75°F.
Plant globe artichokes in a location with full sun from bare root stock in January or from container grown stock later in the spring. To cultivate artichokes in cold winter climates, protect the root with several inches of straw mulch. Expert cold-weather gardeners go one better and grow them outdoors in large containers, and then move them to a protected location when the temperature drops. Fertilize (after you see greenery) with a small amount of all-purpose fish fertilizer. Micronutrients from seaweed extract are also beneficial.

Harvesting and Storage
Artichokes are ready to harvest when the edible flower buds are closed tightly and squeak slightly when squeezed. If you wait for them to open, they will be too tough to eat. Search the interior of the plant when picking because the chokes hide in the foliage. Small buds can be eaten whole without removing the fuzzy choke center.
Artichokes take at least 110-150 days to reach maturity, if planting from seed and 100 days from divisions. Most do not flower until the second year of growth.
Once the harvest is over, cut the plants back to 1-2 inches off the ground to try for a second harvest. New sprouts will form at the base of the plant. At the end of the season, allow the plant to dry out after the leaves begin to turn yellow. Once the foliage has died down and dried, remove it from the plant and put down a layer of organic compost to enrich the soil for next years crop.
For best flavor, pick in the early morning, rinse and eat fresh. Artichokes can be stored in the produce drawer of your refrigerator for up to 2 weeks.
Insect & Disease Problems
Protection from earwigs is absolutely crucial. Also, keep an eye out for aphids, armyworms, slugs and snails. Use organic diatomaceous earth or other natural pest control method, if present.
Seed Saving Instructions
Artichoke flower heads are cut when completely open and beginning to show their white seed plumes. Store the flower heads in a dry location away from direct sunlight until dry and brittle. Place one of the dry flower heads in a feed sack or canvas bag on a concrete surface. Pound the base of the blossom with a hammer and allow the down to float out of the bag. The seed is heavy and will remain behind, but should be removed from the bag after each flower is processed to avoid crushing.


