
Cannas, more commonly known as canna lilies, are vibrant tropical plants known for their colorful blooms and foliage. These versatile perennials come in a variety of shades that are sure to attract the admiration of passersby and the attention of hummingbirds alike.
Thanks to their hardy nature, canna lilies can fit well in many different climates and environments, whether as stars of container plantings or standing tall in garden beds.
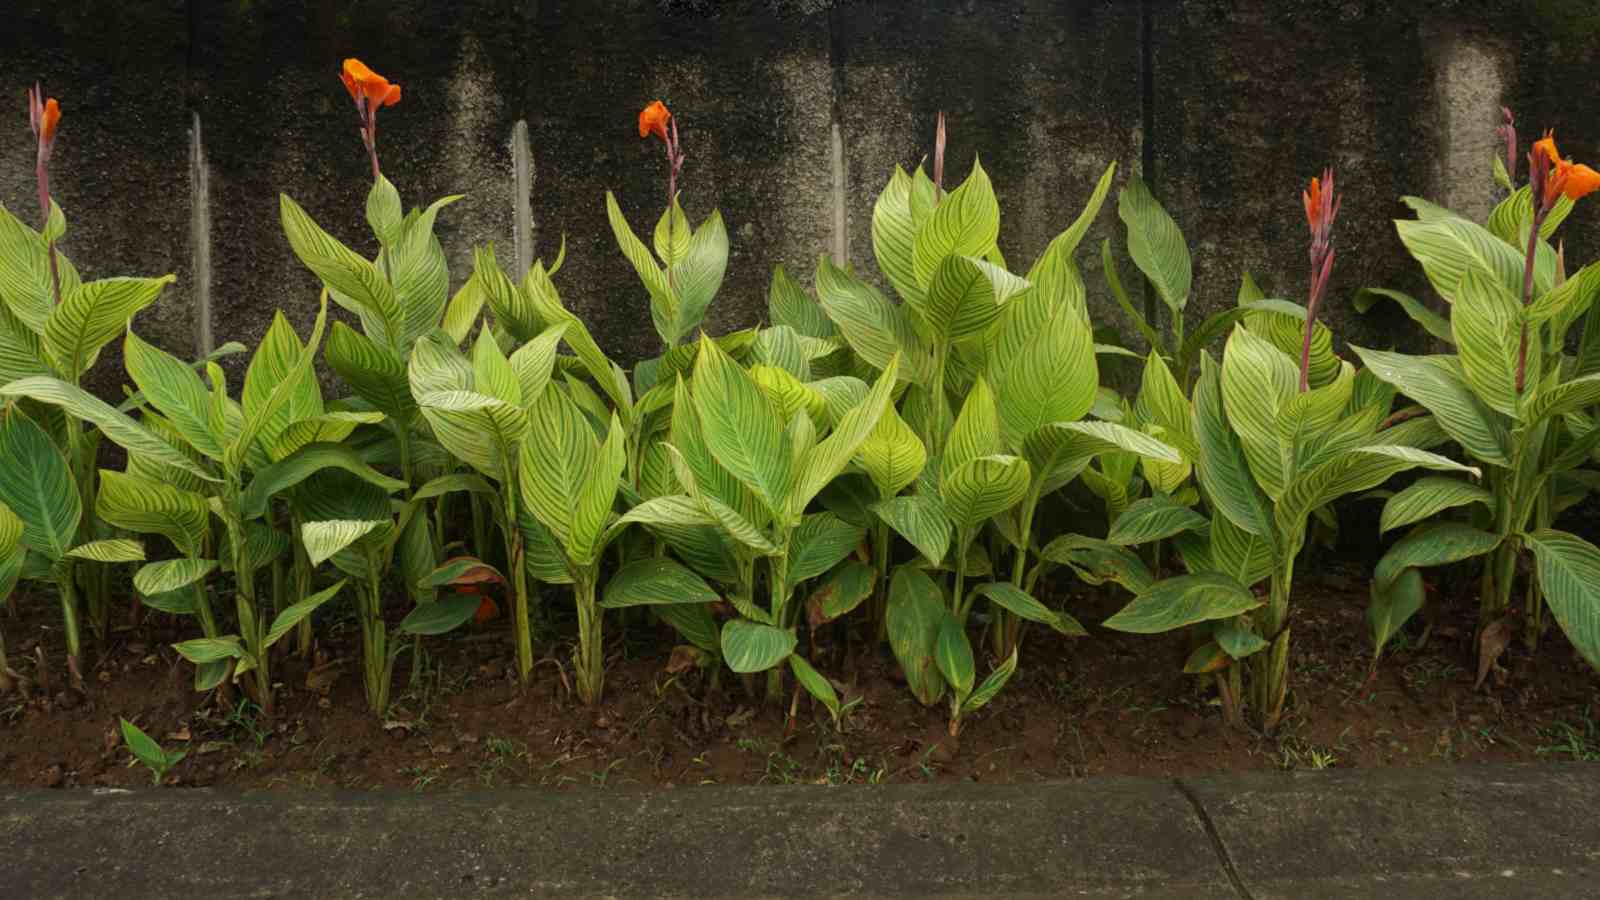
Canna lilies bloom atop sturdy stems that can reach several feet in height, depending upon the variety, among which is the popular tropicanna, recognizable for its striped green and bronze leaves.
Although not actual lilies, canna plants have their own unique appeal, boasting large leaves of green or bronze that provide an excellent backdrop to their bright and showy blooms.
Interestingly, another feather in the cap for canna lilies is that they are deer resistant, making them safe for unguarded outdoor spaces.
Growing canna lilies is akin to bringing a dash of the tropics to your own backyard. Despite their origins in warmer climates, canna plants excel in a wide array of settings, from full sun to partial shade.
Wherever you choose to grow these gems, rest assured they will provide rich color and texture that revitalizes even the most dull of gardens.
Their stunning seamless blend of blooms and foliage makes growing canna lilies an exceptionally rewarding venture for any gardener.
As a master garden I’ve always loved these stunning flowers and in this article I’ll share all my knowledge and expertise on how to grow and care for canna lily flowers.

Botanical Name: Canna × generalis
Common Name: Canna lily, canna, arrowroot
Family: Cannaceae
Plant Type: Annual, perennial, rhizome
Hardiness Zones: 6a – 10a (USDA)
Sun Exposure: Full sun
Soil Type: Moist soil
Soil pH: Acidic, neutral
Bloom Time: Summer
Flower Color: Yellow, orange, red, pink
Native Area: Caribbean, East and West Africa, Central and South America
Canna Lily Plant Care
Canna lilies are perennials that create a tropical ambiance with their lush, green foliage and vibrant blooms of yellow, orange, pink, and the stunning bronze Tropicannas.
For optimal growth, canna lilies prefer plenty of compost and moist soil in a spot with full sun, although they can tolerate light shade.

Avoid waterlogged conditions, but provide regular moisture through the growing season and take care to deadhead spent blooms to promote more buds.
Though generally pest-resistant, watch for slugs, snails, and caterpillars, which might disturb the leaves.
Starting from canna lily bulbs or rhizomes, these plants can reach several feet in height, making them a perfect choice for container plantings or vibrant garden borders.
Light
Canna lilies demand an abundance of light to exhibit their best potential. Preferring full sun, these perennials are most vibrant when exposed to at least 6 hours of direct, unfiltered sunlight each day.
Yet, the tropicanna variety, with its colorful foliage, can slightly tolerate more shade, but its exotic, striking hues dim in the absence of enough sun.
Diffused light results in lusher green foliage but at the cost of fewer and less vivid blooms.
So place your container plantings of lilies in the sunniest spots of your yard or garden for the most rewarding floras.
Soil
The ideal soil for canna lilies should be rich in organic matter, with plenty of compost added. This helps the cannas, often grown as perennials, by providing a hospitable environment for the canna rhizomes and canna lily bulbs.
A depth of at least a foot of loose, well-draining soil is beneficial to support the large tropical plants.
The inclusion of peat moss in the composition can help retain moisture without waterlogging the rhizome, ensuring moist soil, crucial for these plants.
While canna plants can tolerate a wide array of soil conditions, a slightly acidic to neutral pH is optimum.
Soils that pool water can lead to rot and attract pests like slugs and snails, which is detrimental to their growth.
Water
Cannas thrive on moisture, especially during the growing season. Although canna lilies do well in moist soil, overwatering can lead to rhizome rot, so it’s good to strike a harmonized balance.
Drier climates or hot summers might need more frequent watering. Pay close attention to container plantings as they tend to dry out more quickly.
Generally, watering about an inch per week should suffice unless the weather is exceptionally hot or dry then, you’ll need to increase the watering frequency.
In winter, reduce watering significantly as the cannas remain dormant.
Temperature and Humidity
Canna lilies thrive in a climate with warm temperatures – they love full sun and heat. Anything below 50°F can cause damage to the cannas.
This makes them ideal plants for areas where temperature averages are consistently high during the growing season.

As for humidity, canna plants are true fans of moisture. They prefer and perform well in moist soil conditions but avoid waterlogged, soggy areas as they can endanger the canna rhizomes.
High levels of humidity boost the colorful foliage of these annuals and perennials and provide optimal conditions for buds to develop into striking blooms.
Fertilizer
Cannas, and specifically canna lilies, have a voracious appetite and thrive when provided with plenty of compost at the start of their growing season.
An application of well-rotted manure or slow-release granular fertilizer works wonders in providing necessary nutrients for the development of vibrant blooms and colorful foliage.
Fertilizer should be applied again every month during the growing season to keep the lilies nourished.
However, overly excessive use of fertilizer can lead to more foliage and fewer blooms, thus it is crucial to maintain a balanced amount.
The plant’s showy flowers coupled with its bronze or green foliage, make the extra effort of fertilization quite worthwhile.
Pruning
Canna lilies require regular pruning through the growing season to maintain their stunning blooms.
This usually involves deadheading, where the faded blooms are removed to prompt the plant to produce more buds. Pruning canna lilies also involves trimming back the stems and green foliage to shape and manage the size of the plant.

At the onset of the first frost, canna lilies should be cut back to a few inches above the ground.
Finally, it’s crucial to inspect your plant during pruning for any sign of pests such as snails, slugs, and caterpillars, which can be detrimental to the plant’s health.
Overwintering
Cannas require some special attention during overwintering. After the first frost, cut back the green foliage to about 6 inches and delicately remove the canna rhizomes or bulbs from the moist soil.
Clean the bulbs and dry them for a couple of days before storing them in peat moss in a cool environment, such as a basement or garage. Keep an adequate level of moisture to stop them from drying out.
Overwintered canna lily bulbs will be ready to be replanted when the growing season returns.
By following these steps, you will be able to enjoy the vibrant blooms of canna lilies for another year.
Types of Canna Lily
- Lucifer: Lucifer is a striking variety of canna lilies known for its fiery red blooms that are sure to catch attention. These canna plants boast green foliage which provides a stark contrast to the bright red blooms.

- The President: The President is a classic variety of Canna Lily, flaunting fiery orange blooms that pair beautifully against the backdrop of large, bronze-green leaves.

- Pretoria (Bengal Tiger): Pretoria, also known as Bengal Tiger, is a captivating variety of Canna Lily that captivates gardeners with its variegated green and yellow-striped foliage.

- Stuttgart: The Stuttgart is a type of Canna that is unique due to its remarkable foliage. It features green leaves that are dramatically splotched with white, giving it a striking appearance even when not in bloom.

- Tropicanna: Tropicanna is undoubtedly one of the most color-rich varieties of Canna Lilies. Its leaves sport a mix of green, gold, pink and bronze, while the blooms are a vibrant orange.

How to Grow Canna Lily from Seeds
Step 1: Choosing Your Canna Lily Seeds
For a splash of color in your garden, consider planting canna lilies. With colorful foliage ranging from green to bronze, and blooms in vibrant hues of pink, orange, and yellow, cannas are sure to brighten up any outdoor space.
There are several varieties to choose from, including the tropicanna, which offers uniquely striped leaves and bright orange blooms.

Step 2: Preparing for Planting
Before planting your canna lily seeds, prepare a place that has access to full sun. Canna plants prefer a sunny climate, but they can tolerate partial shade.
They prefer moist soil, so add plenty of compost to improve the soil’s moisture retention.
A layer of peat moss will also help with moisture and can buffer the soil pH. Additionally, cannas are heavy feeders, so the richer your soil, the better. You can choose to grow your cannas in pots or directly in the ground.
If your region experiences colder winters, consider container plantings or digging up your canna rhizomes before the first frost and storing them in a garage or basement to replant next growing season.
Step 3: Planting Your Seeds
When planting your Canna Lily bulbs or seeds, ensure to plant them at the correct depth.
A rule of thumb is to plant bulbs three to four times their vertical height, so about four to six inches of soil should cover your canna lily bulbs.
This aids in protecting them from pests such as deer, snails, slugs, or caterpillars which can damage your plants.
Step 4: Caring for Your Cannas
Once planted, cannas require minimal care to thrive. They need a good watering system to keep their soil moist, especially during the growing season.
Monitor your plants for signs of pests or diseases such as rust, which can attack the leaves. On a positive note, cannas are deer-resistant and attract beneficial wildlife like hummingbirds.

Deadheading, or removing the old blooms, will not only improve the appearance of your canna lilies but also encourage new buds and blooms. Cut the flower stems back to the next side shoot where a new bud is forming.
How to Propagate Canna Lily
Step 1: Bulb Division
The propagation of your canna plants generally occurs via division of their canna rhizomes (often referred to as canna lily bulbs).
These bulbs, hidden under a few inches of soil, can be excavated carefully without damaging the green foliage.
Using a sharp knife, divide the rhizome ensuring each section comprises at least one eye (buds), which is essential to initiate the growth in the forthcoming growing season.
Step 2: Storage of Divided Bulbs
After division, the bulbs should be allowed to dry in a shady area for a few days before storing them in pots filled with slightly moist peat moss.
These pots can safely be stored in cooler, unfrequented parts of the house like the garage or basement, away from the risk of frost.
This step is crucial as the first frost can damage the bulbs and make them unusable.
Step 3: Planting and Aftercare
When it’s planting season, the bulbs can be planted at the right depth of four to five inches in well-drained soil.
The new shoots emerge with proper sun and moisture, rewarding you with healthy cannas.

To ensure a healthy plant and continuous bloom, ensure deadheading of wilting flowers and remove any diseased leaves showing signs of rust.
While cannas are resistant to pests, watch out for snails, slugs, and caterpillars which could damage your plants.
How to Pot or Repot Canna Lily
Step 1: Gathering Required Materials
Before getting started on potting or repotting your Canna lilies, it is important to gather all the necessary supplies.
You will need pots with good drainage, potting soil that preferably contains plenty of compost and peat moss, and your Canna lily bulbs or Canna rhizomes.
With their colorful foliage and enchanting blooms in hues of yellow, pink, and orange,
Canna plants are often grown for their dramatic tropical effect and are a popular choice with gardeners, even though they may be annuals or perennials, depending on the climate.
Step 2: Preparing the Pot and Soil
Choose a pot with a depth that allows you to cover the rhizome with 3-4 inches of soil. Fill the pot halfway with moist potting soil and add the peat moss if your soil does not include it.
Cannas enjoy rich, moist soil and require regular moisture during the growing season. The peat moss will aid the soil in retaining moisture and ensure that the Canna lilies have a good start in their new home.
Step 3: Planting the Canna Rhizome or Bulb

Place your Canna lily bulb or rhizome on top of the soil in your pot, ensuring the growth buds are pointing upwards.
These plants are not particular about their planting orientation but ensuring the growth buds are upwards can help your Cannas get established faster.
Cover the bulb or rhizome with more moist soil, filling to about an inch below the pot rim.
Step 4: Finding a Spot for the Pot
Canna lilies prefer full sun but can tolerate some shade. Locate your pot where it will get plenty of sunlight.
Canna plants are also great as container plantings, and their green or bronze leaves can contrast beautifully with other plants in your garden.
Common Pests and Plant Diseases for Canna Lily
Snails and Slugs

The tender green foliage and vibrant blooms of canna lilies attract snails and slugs, who leave a trail of damage in their wake.
The pests feed on the leaves, stems and buds of the plant, leaving large, irregularly shaped holes.
Regular monitoring and removal are beneficial to minimize damage from slugs and snails, alongside using natural pest deterrents.
Caterpillars

Caterpillars, particularly the canna leaf roller, pose significant risks to canna plants. The green caterpillars roll and tie the leaves of the plant, and feed on the inside, causing severe damage.
In some cases, this can lead to a reduced yield of the beautiful orange, pink, and yellow blooms. Regularly inspect canna lilies during the growing season to catch these pests early.
Deer

While cannas are generally deer resistant, in areas with high deer populations, these animals may still feast on the colorful foliage and blooms.
This can severely stunt the growth of the plant, potentially damaging the rhizome and making it difficult for the plant to store energy for the next growing season.
Planting cannas in protected areas or using deer deterrents can mitigate the risk.
Rust

Canna lilies can be susceptible to rust, a plant disease that causes discolorations and deformations on the leaves, inhibiting photosynthesis and thereby stunting the plant.
This disease loves moisture, so ensure your plants have plenty of air circulation and avoid soaking the leaves to prevent outbreaks.
Canna Lily Virus
Symptoms of this viral infection include distorted and mosaicked yellow and green leaves, streaked flowers, and reduced growth.
If left untreated, the virus can weaken the plant to the point where it can’t produce blooms.
There’s no cure for this disease, so infected plants should be discarded to prevent it from spreading to healthy plants.
Common Plant Problems and Solutions for Canna Lily
Brown Tips on Leaves
This is a common issue in canna plants, particularly those growing in pots. The browning often indicates an issue with moisture levels.
These plants prefer moist soil enriched with plenty of compost and a regular watering schedule is crucial during the growing season.
Leaves with severe browning may be trimmed back to enhance the look of your green foliage.
Yellowing Leaves
Yellowing of canna lily leaves can be a symptom of several potential problems, including a lack of nutrients, overwatering, or pests such as snails and slugs.
If the yellowing is accompanied by bronze or rust spots, this may indicate an infestation by rust fungi.
Add a slow-release fertilizer to your cannas’ soil and ensure proper drainage to avoid water logging. Pesticides can be obtained to handle rust fungi and common pests.
Failure to Bloom
Cannas are renowned for their colorful foliage and vibrant blooms, usually showcasing shades of yellow, pink, or orange.
If you’re not seeing these eye-catching blooms, it might be because your canna lilies aren’t getting enough sunlight.
These plants thrive in full sun. Deadheading, or removing spent blooms, can also spur new buds to form and bloom.
Frost Damage

Cannas are tropical plants and can be quite sensitive to the cold.
Once the first frost hits and leaves begin to blacken, it’s time to dig up your canna lilies or canna rhizomes and store them for winter.
A dry, cool place such as a garage or basement is ideal for storage.
Poor Growth
Once planted, cannas should take off pretty quickly. If growth seems slow, it’s usually a problem with the planting depth or soil quality.
Canna lily bulbs should be planted few inches deep in a warm, sunny location. A well-drained soil enriched with compost and peat moss can encourage rapid growth.
Other Flower Guides from Planet Natural:
Sow and Grow: The 12 Easiest Flowers for Seed Starting


