
Drying fruits and vegetables has distinct advantages over canning, freezing or other preserving methods that require extreme temperatures. Dried foods require little if any energy to store compared to frozen items that require refrigeration and canned items requiring cooking and container boiling.
Dried fruits and vegetables weigh less and take up less shelf space than canned. They retain most vitamins and minerals better than canning or freezing. They don’t lose fiber. And they don’t lose flavor. They concentrate it.
Some produce not normally preserved by canning and or freezing — think banana — is particularly suited to drying. Drying heirloom tomatoes and other produce from your garden gives you dried delights that you won’t find in grocery stores. Another plus: dried fruits and vegetables, if processed correctly, will keep longer than those canned or frozen.
Best, the foods you dry yourself are much less expensive than the ones you buy in stores. Another plus: unlike the store-bought dried fruits and vegetables you know how the they were processed and what additives were (or weren’t) added.
Modern food dehydrators have made home fruit and vegetable drying relatively quick and convenient. But long-practiced methods of outdoor drying, brought up to date with modern technology, are effective and energy saving. Oven drying, though not as efficient, is still popular for infrequent, small batches.
Preparing foods for drying — preventing discoloration of fruits and blanching vegetables — is a necessary step no matter what drying technique you use. Proper storage extends the life of dried fruits and vegetables far beyond those frozen or canned. Here’s what you need to know to get started drying garden produce at home.

SAVE YOUR HARVEST!
Harvest Supplies
Protect and preserve your harvest with drying racks, food storage bags and much more!
View allDon’t waste your yields! Our harvest equipment and storage supplies will preserve your precious bounty — whether home-grown herbs, seasonal fruits or sun-dried tomatoes — keeping it safe from dust and molds until ready to use.
Principles of Drying
Drying extracts moisture from fruits and vegetables. Removing this moisture inhibits the bacteria, molds and other microorganisms that cause spoilage. Drying at proper temperatures retains the natural enzymes and also prevents enzymatic deterioration during storage.
Two complementary factors facilitate the drying: heat and humidity. Warm and less humid conditions encourage the fastest drying. Proper air circulation allows heat and low humidity to do their job quickly and efficiently.
Keeping temperatures around 130-140 degrees dries most produce quickly while preserving its nutritional content. (Drying meat and making jerky (PDF) requires special methods and higher temperatures.)
Air circulation — moving the evaporated moisture away from the food — facilitates rapid drying. The more surface exposed to moving air, the faster and more efficient the drying. Thin slicing and leaving space around your drying produce is important. Never stack or crowd fruit or vegetables that are drying in an attempt to process more than your equipment can effectively hold.
Food dehydrators have made drying fruit and vegetables easy. A food dehydrator with heating element, thermostat and blower allows you to control drying conditions. Drying food naturally outdoors requires both the right conditions and a degree of care. Both indoor and outdoor methods require a measure of attention.
Outdoor Drying
The practice of drying fruits and vegetables in the open air goes back to the beginning of recorded time. The label “sun-dried” has become a gourmet go-to, giving panache to apricots, mangoes and especially tomatoes. Outdoor drying doesn’t require much equipment — just the trays or other support for what you’re drying — but it does require specific, minimum conditions.
Fruits, including strawberries, apples, grapes and cherries, with their relatively high sugar and acid content, are good candidates for outdoor drying. The set-up can be as simple as an over-turned plastic milk crate or a mesh window screen set on bricks or concrete blocks. Setting the blocks on a tarp can help keep dust down.
You can buy clever set-ups that will air-dry fruits and vegetables indoors or out.
Do not use mesh trays made of aluminum or those that have been galvanized.
Thinly sliced fruits can also be sun-dried on cookie sheets and other flat, non-reactive surfaces. Cover the fruit with a white Turkish towel and place it where the sun can impart its warmth (even inside).
Some regions of the country, including the humid South and the rainy Pacific Northwest, aren’t conducive to sun drying. Daytime temperatures above 85 degrees are ideal. Humidity below 60% is a necessity.
In areas of intense sun including the desert Southwest and the Rocky Mountain, high-altitude states, fruit being dried should be shaded to prevent deterioration of vitamins and beneficial enzymes. If insects are a problem, protect drying fruit with mosquito netting.
Most foods, including fruits (especially those with skin left on) and shelling beans, require treatment before they are sun dried to kill insects and their eggs. Do this by placing sliced fruit or beans in the freezer for two days. Or they can be treated in an oven set to 160 degrees for one-half hour. Check the oven temperature with an oven thermometer. Even at lowest setting, many ovens will be hotter than 160 degrees and may cook the food.
Hint: Salt tomato slices when putting them out to dry. The salt not only improves flavor but helps draw out moisture.
Solar drying concentrates the sun’s rays to maximize heat and air movement. A simple setup covering drying trays with clear plastic (while allowing for air circulation) to increase heat can work surprisingly well with the right conditions. While its practice is ancient, modern advances in solar-generated electricity make it an increasingly cutting edge technology with its potential for off-the-grid drying with a heating element and fan.
There’s also ingenious low-tech plans for self-contained solar devices that collect sun-warmed air and send it up to trays where fruit is drying.
Indoor Drying
Processing fruits and vegetables in a food dehydrator is the most convenient and effective method of drying. It’s also the most energy intensive, using electricity to run a heating element and fan.
Dehydrator boxes hold a set number of screened trays on which the food is placed. Boxes are designed to hold an optimum number of trays without hindering air circulation. Heating elements and fans provide the warmth and humidity control required for efficient drying.
Well-designed dehydrators are sufficiently vented, offering ways for moist air to escape. A properly vented food dehydrator dries produce more consistently and evenly.
Dehydrators should have an accurate thermostat that can maintain ideal temperatures, usually in the 130 (or lower) to 145 degree range. If you plan to make meat jerkies, the heating element must be capable of maintaining temperatures of 145 degrees and above.
Some dehydrator boxes are insulated, maintaining warmth with less electricity. Position your dehydrator where the escaping warm air will best contribute to the heating of your kitchen and nearby areas. When choosing a dehydrator, make sure to hear it run before you buy. You’ll want a dehydrator with a quiet fan.
Though frequently extolled in the online press, oven drying often yields an inferior result in both quality and nutrition retention. The low oven temperatures required are hard to maintain and some ovens won’t even be capable of the settings of 150 degrees or lower. Oven drying often results in a drier, more discolored product.
That said, you can successfully dry small fruits like cherries in small batches, even if it requires keeping a close eye on your oven and turning it off when an oven thermometer — not the one on the stove’s control panel but the one you buy and put inside the oven — approaches 150 degrees.
The real work here is pitting and halving the cherries. It takes a long time and a bit of patience to fill a cookie sheet with halved cherries, even when leaving plenty of room for air circulation. Brush the pan with a bit of grape seed oil if you’re worried the cherries might stick. Start with the cherries skin side down and turn them over an hour or two along the way.
Choosing and Preparing Fruits and Vegetables for Drying
Best results come from the best produce. Don’t use bruised apples or fruit that’s past ripe (best is fruit just before it’s completely ripe). Don’t use woody beans, peas past their prime or over-sized zucchini. No form of preservation will ever make them better than they once were.
Most vegetables need to be trimmed to size then blanched or steamed before drying. Beets are an exception. Roast them in the oven and take them out as soon as they are cooked all the way through before slicing and drying.
Ascorbic acid (Vitamin C) and citric acid are often used as a pre-treatment to keep fruits from browning. In the wonderful guide to drying (PDF) published by Pacific Northwest Extension, there’s a chart that lists pretreatment recipes for preserving color and vitamin retention as well as “enhanced pathogen” control (scroll through to page 7).
Honey dip is a tried and true treatment to prevent discoloration. Dissolve one half cup sugar to one-and-a-half to two cups of boiling water. Allow to cool before stirring in a half cup of honey. After dipping fruit slices in the warm mixture, allow to set and drain a minute or two before placing on drying trays. Parchment paper can help here.
Sulfuring fruit is probably the most effective way to prevent discoloration while drying. The sulfur the fruits are exposed to is said to dissipate during the drying process. Those of us who’ve eaten our share of sulfured fruits over the years can attest to post-digestion evidence that it does not.
Sulfuring is also somewhat difficult. The fruit is “smoked” with U.S.P. grade (pure, pharmaceutical) sulfur, a process that also helps preserve flavor and keep insects away during the drying process. Utah State University Extension offers a detailed look at sulfuring (PDF, page 9) in their online comprehensive guide to food drying. Never attempt to sulfur fruits in your oven or anywhere else indoors.
Another alternative is to soak fruit in sodium bisulfite. Be sure to use only food grade bisulfite, available from wine-making supply stores. Some people are sensitive to sulfites and their consumption can cause severe reactions. Be extra careful. The University of Georgia Cooperative Extension Service has a detailed booklet (PDF) on drying that includes specific pre-treatment directions for specific fruits and vegetables, everything from nectarines to okra, at its end. Worth checking out.
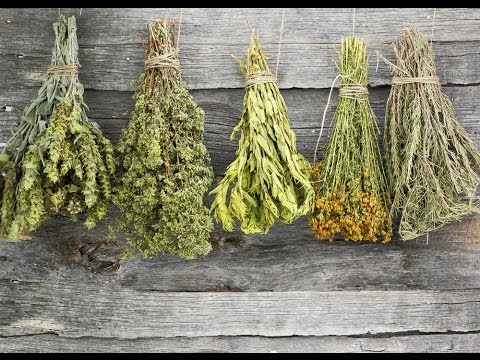
Looking to dry herbs? Go here.


