
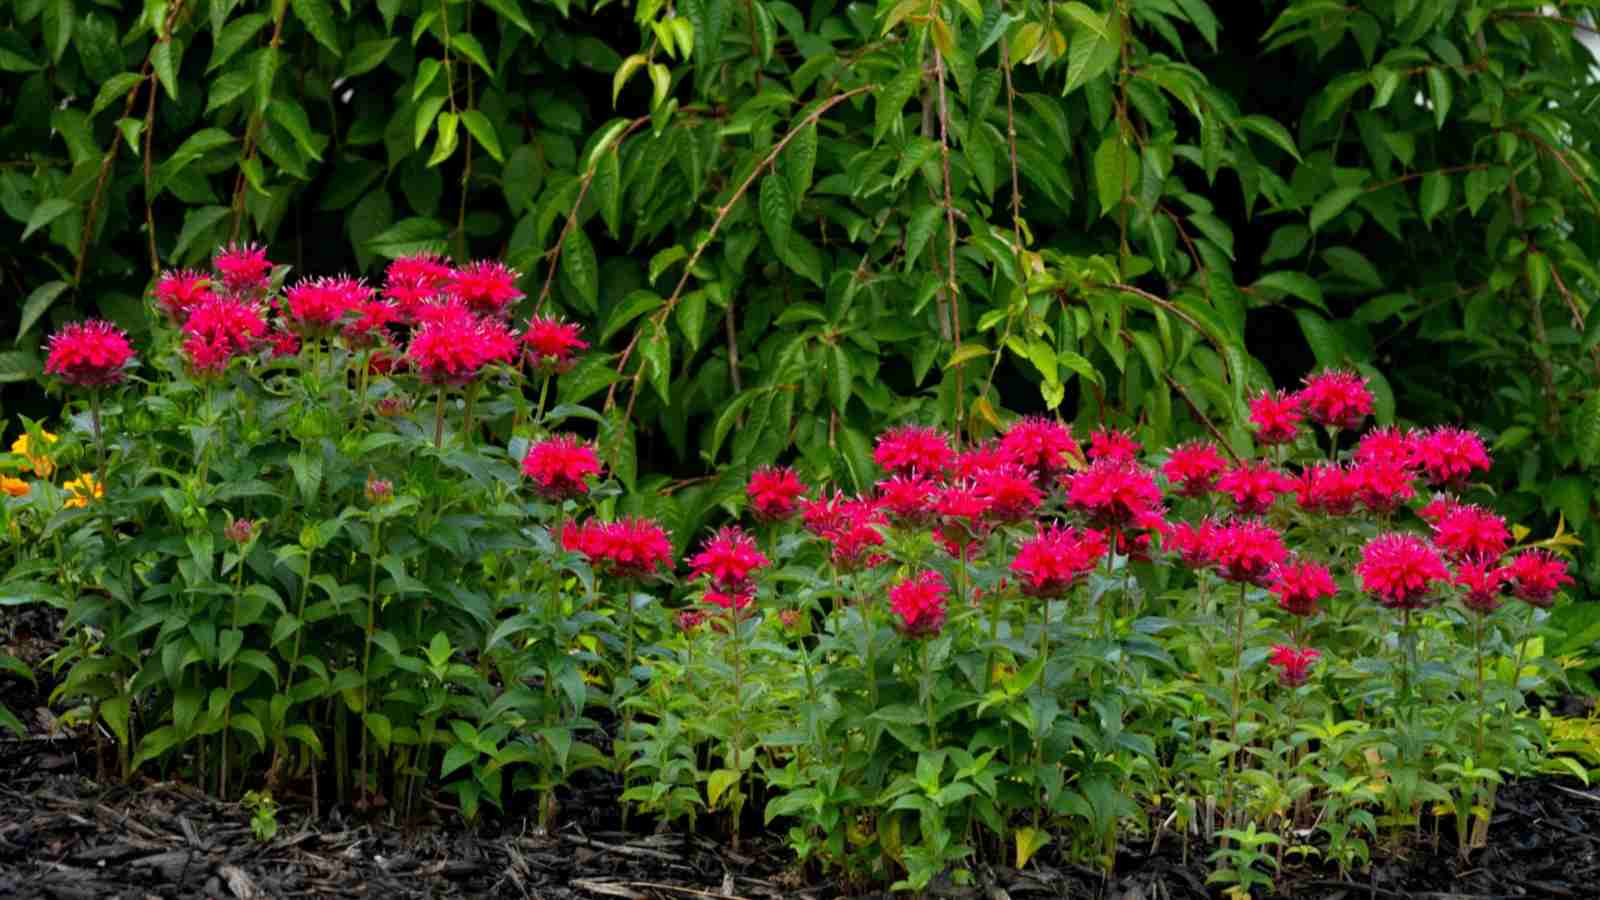
Bee balm, a member of the mint family Lamiaceae, is a herbaceous perennial known for its vibrant blooms and aromatic foliage. This native plant is a favorite among gardeners for its vigor and ability to attract a myriad of pollinators such as hummingbirds, bees, and butterflies.
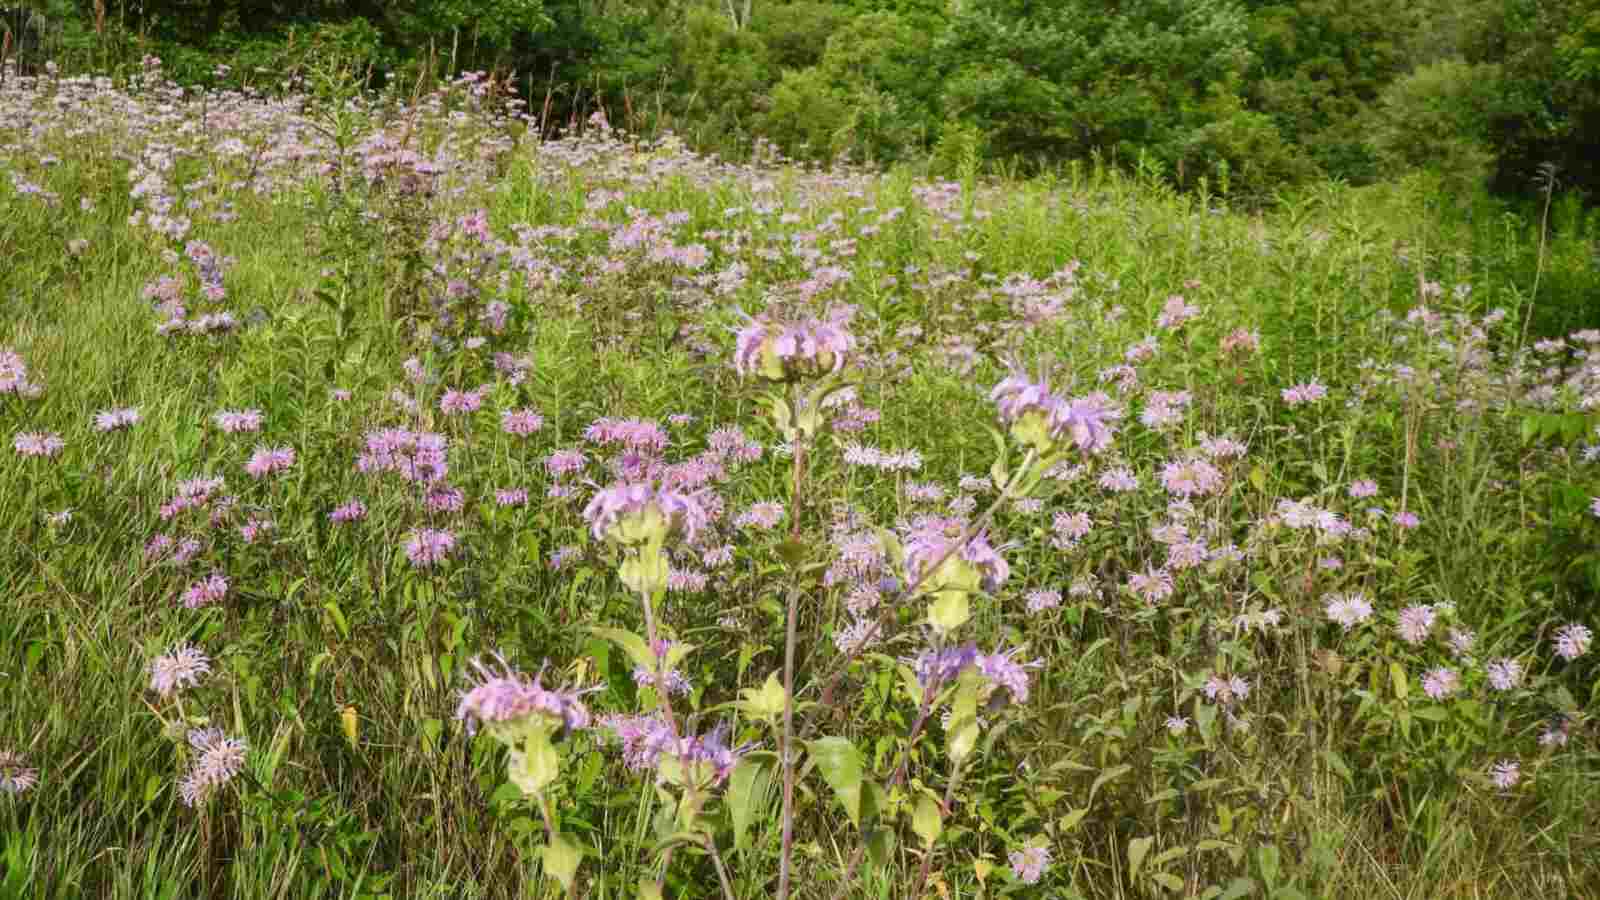
Bee balm spreads easily, making it an excellent choice for filling in a perennial border or adding a pop of color to a sunny garden. Its tubular flowers, available in a range of hues from crimson to lavender, are a source of nectar that pollinators find irresistible.
The plant’s sturdy stems, reaching up to 3 feet in height, are topped with flower heads that bloom from early spring to midsummer. These blooms are not only a visual treat but also a source of flavor, as the leaves can be used to infuse teas and culinary dishes with a subtle minty taste.
Bee balm is also prized for its resilience, thriving in a variety of conditions from full sun to partial shade. With good air circulation and a few inches of compost mulch at the base of the plant, it can withstand dry soils and last the entire growing season.
However, this plant isn’t without its challenges. It is susceptible to powdery mildew, rust, aphids, and spider mites. Nevertheless, with proper care and attention, bee balm can be a beautiful and beneficial addition to any garden.
As a master gardener, I have cultivated and cared for bee balm plants for many years, and in this comprehensive guide, I’ll share everything you need to know about growing and caring for bee balm in your garden.

Botanical Name: Monarda spp.
Common Name: Bee balm, horsemint, monarda, bergamot, wild bergamot
Family: Lamiaceae
Plant Type: Herbaceous, perennial
Hardiness Zones: 3 – 9 (USDA)
Sun Exposure: Full, partial
Soil Type: Rich, moist
Soil pH: Acidic, neutral
Bloom Time: Summer
Flower Color: Red, purple, pink, white, lavender
Native Area: North America
Bee Balm Plant Care
Bee balm plants thrive in full sun but can also tolerate light shade, making them a versatile addition to your garden. Plant them in well-draining soil enriched with a few inches of compost at the base of the plant.
For optimal growth and vigor, ensure good air circulation around the stems and foliage. Mulch can help maintain moisture levels, especially during the hot midsummer months.

Deadhead the flower heads to encourage continuous blooms and prevent the spread of powdery mildew, a common issue with this herbaceous perennial. Be mindful of aphids and spider mites, which can affect the leaves and new growth.
Light
Bee balm plants are sun-loving perennials and thrive best in full sun. A minimum of six hours of direct sunlight is ideal for the vigor and abundant blooms of bee balm.
However, they can also tolerate partial shade, especially in the hotter regions, but this might result in reduced flower heads and overall plant vigor.
It is essential to note that even though bee balm can tolerate some shade, the more sun it receives, the more vibrant its flower heads and foliage will be.
Soil
Bee balm plants thrive in moist, well-draining soil rich in organic matter. Before planting, amend the soil with a few inches of compost to improve its moisture retention and nutrient content.
They can tolerate a wide range of soil conditions, including slightly acidic to slightly alkalinity. However, they will not do well in overly wet or dry soils.
If you are planting bee balm in a small pot, ensure the potting mix remains consistently moist but not waterlogged.
Water
Bee balm plants prefer moist growing conditions, especially during the hot and dry midsummer months. While they can tolerate periods of drier soil, consistent moisture levels at the base of the plant encourage the vigor of new growth and flower heads.
However, it’s crucial to avoid overwatering as this can lead to powdery mildew, a common issue with plants in the lamiaceae family. A good rule of thumb is to provide around 1-2 inches of water per week, either through rainfall or manual watering.
Ensuring the plant is situated in an area with good air circulation can also aid in maintaining appropriate moisture levels while reducing the risk of mildew.
Temperature and Humidity

Bee balm thrives in a wide range of temperatures, but they perform best in areas with full sun exposure. They can tolerate partial shade, but it may result in fewer blooms and less vigor.
These herbaceous perennials are native to North America and are quite hardy, enduring temperatures from the last frost of spring to the midsummer heat. Bee balm prefers good air circulation and moist, but not waterlogged, conditions.
While they can adapt to dry soils, consistent moisture is ideal for optimal growth. However, high humidity can lead to issues like powdery mildew, so ensure there’s enough space between plants for good air circulation and consider a preventative mulch of several inches of compost around the base of the plant.
Fertilizer
Bee balm benefits from a good dose of compost in early spring. Incorporating a few inches of compost at the base of the plant not only enriches the soil but also helps with moisture retention in dry soils.
For new plants, a small pot of compost can be mixed into the planting hole at the time of planting. Additionally, a light top-dressing of compost around the base of established plants in midsummer can provide a nutrient boost for the growing season ahead.
Pruning

Bee balm plants benefit from regular maintenance to ensure their vigor and full sun blooms. To promote new growth and maintain good air circulation, deadhead the flower heads in the midsummer.
This not only prevents the spread of powdery mildew and rust but also encourages the plant to produce more tubular flowers, which are a favorite of hummingbirds and butterflies.
In early spring, just as the new plants emerge, give the bee balm a good pinch to stimulate bushier growth. Lastly, in the perennial border, cut back the herbaceous perennial to the base of the plant after the last frost in preparation for the new growing season.
Overwintering

Bee balm plants are hardy and can withstand winter conditions, but they benefit from a layer of mulch, about 2 inches of compost or organic matter, at the base of the plant to help retain moisture and protect the roots in colder climates.
This is particularly important if the winter is dry, as bee balms prefer moist soil and can struggle in overly dry conditions.
The mulch also helps to prevent the growth of powdery mildew, a common issue with bee balms, by ensuring good air circulation around the base of the plant.
In early spring, as the last frost passes, it’s a good practice to clear away the mulch to allow for new growth to emerge.
Types of Bee Balm
- Monarda didyma ‘Jacob Cline’: ‘Jacob Cline’ is known for its vibrant red blooms that are a favorite of hummingbirds and butterflies.

- Monarda didyma ‘Pardon My Lavender’: ‘Pardon My Lavender’ is a compact variety of bee balm that is perfect for small gardens or as a border plant. Its tubular lavender flowers are a rich source of nectar and this variety is noticeably resistant to powdery mildew.
- Monarda fistula ‘Claire Grace’: ‘Claire Grace’ is a robust bee balm plant that exhibits exceptional vigor, producing masses of pink flower heads from early to midsummer. It’s resistant to powdery mildew and rust, and its fragrant foliage adds to its appeal.
- Monarda ‘Scorpion’: ‘Scorpion’ is a unique bee balm variety with striking red and white bi-color blooms that are a magnet for pollinators.

- Monarda ‘Marshall’s Delight’: ‘Marshall’s Delight’ is a classic bee balm cultivar, known for its rich, red flower heads and aromatic foliage. It’s a favorite of bees and butterflies and requires moist, well-drained soil.

How to Plant Bee Balm From Seed
Step 1: Preparing for Planting
When it comes to planting bee balm, the first step is to prepare the ground. Bee balm prefers a rich, well-draining soil, so start by adding a few inches of compost to the area where you plan to plant.
This will not only provide the plant with the necessary nutrients but also help improve the soil’s ability to retain moisture.
Step 2: Choosing the Right Time
Bee balm can be planted from seed in early spring, just after the last frost, or in midsummer. However, if you want to enjoy its vibrant blooms for the longest possible time, it’s best to aim for early spring planting.
Step 3: Sowing the Seeds
Bee balm seeds are tiny, so you can start them off in a small pot. Scatter the seeds on the surface of the soil, then cover them with a thin layer of compost.
Keep the soil consistently moist but not waterlogged, and place the pot in a location that receives full sun or partial shade.

How to Propagate Bee Balm
Step 1: Division
One of the easiest ways to propagate bee balm is through division. This method is best done in early spring before the new growth appears.
Use a sharp spade or knife to carefully divide the plant at the base, making sure each division has several healthy shoots and a portion of the root system.
Step 2: Root Cuttings
Bee balm can also be propagated from root cuttings. In late fall or early spring, dig up the plant and cut the root into sections, each about 2-3 inches long.
Plant the cuttings in a small pot filled with a well-draining mix of soil and compost, making sure the cut end is facing down. Keep the soil evenly moist and place the pot in a warm, bright location.
Step 3: Seed Propagation
For those who enjoy the process of growing plants from seed, bee balm can also be propagated this way. Collect the seed heads from the plant in midsummer, after the flowers have faded.
Remove the seeds from the heads and store them in a cool, dry place until the following spring. Sow the seeds in a prepared seedbed or in pots filled with a seed starting mix, covering them lightly with soil. Keep the soil consistently moist until the seeds germinate.
Step 4: Planting the New Plants

Once the new plants have established roots, they can be planted in their permanent location. Choose a site with full sun to partial shade and well-draining soil.
Bee balm spreads vigorously, so give the plants plenty of space in the perennial border. Water the new plants thoroughly after planting and continue to provide regular moisture throughout the growing season.
How to Pot or Repot Bee Balm
Step 1: Choose the Right Planting Time and Location
Bee balm is a native herbaceous perennial that thrives in the garden. It prefers full sun but can also tolerate some shade, especially in hotter climates.
The best time to pot or repot bee balm is in early spring, just after the last frost date. Choose a location with good air circulation to prevent powdery mildew and rust on the leaves and stems.
Step 2: Prepare the Pot and Soil
Bee balm plants prefer moist, well-draining soils but can also tolerate dry soils once established. Fill a small pot with a few inches of compost to provide the plant with the nutrients it needs to thrive.
You can also add a layer of mulch to the top of the soil to help retain moisture and suppress weeds. Bee balm spreads vigorously, so make sure to choose a pot that can accommodate the plant’s growth.
Step 3: Pot It

Carefully remove the bee balm plant from its current pot, taking care not to damage the roots. Place the plant in the center of the new pot and fill in around the roots with more compost.
Gently press down on the soil to remove any air pockets. Water the plant thoroughly to help settle the soil around the roots.
Common Pests and Plant Diseases for Bee Balm
Aphids

Aphids are small, soft-bodied insects that can infest your bee balm plants, particularly during the early growing season. They are attracted to the sweet nectar of the tubular flowers and can cause damage by sucking the sap from the stems and leaves.
This can lead to wilting and a decrease in the vigor of the plant. Regular inspection of your bee balm and the use of beneficial insects, such as ladybugs, can help control aphid populations.
Spider Mites

Spider mites are another common pest that can affect bee balm. These tiny arachnids feed on the undersides of the leaves, causing them to take on a stippled, yellow appearance.
Severe infestations can lead to defoliation and a decrease in the plant’s ability to produce energy through photosynthesis. Spider mites thrive in hot, dry conditions, so be sure to provide adequate moisture to your bee balm and ensure good air circulation to prevent their spread.
Powdery Mildew

Powdery mildew is a fungal disease that can affect many plants, including bee balm. It presents as a white, powdery growth on the leaves and flower heads, and can lead to a decrease in the plant’s overall health and vigor.
Good air circulation and avoiding overhead watering can help prevent powdery mildew. If your bee balm does become infected, remove and dispose of the affected plant material and consider applying a suitable fungicide.
Rust
Rust is another common fungal disease that can affect bee balm. It presents as orange or yellow pustules on the undersides of the leaves and can cause premature defoliation.
Rust thrives in humid conditions, so be sure to provide good air circulation and avoid overhead watering. If your bee balm does become infected, remove and dispose of the affected plant material and consider applying a suitable fungicide.
Common Plant Problems and Solutions for Bee Balm
Brown Tips on Leaves
This is often a sign of inconsistent moisture or dry soils. Bee balm, a member of the mint family, prefers a consistently moist growing medium.
To mitigate this issue, apply a generous 2-3 inches of compost or mulch to the base of the plant to help retain moisture. Also, water the plant regularly, especially during the hot summer months.
Yellowing Leaves
Yellowing leaves on bee balm can be a symptom of powdery mildew or rust, common fungal diseases.
To prevent these, ensure good air circulation around the plant and avoid overhead watering. If the diseases are already present, remove and destroy affected leaves and treat with a fungicide labeled for use on bee balm.
Failure to Bloom
Bee balm is prized for its vibrant flower heads, which attract hummingbirds, bees, and butterflies with their nectar-rich, tubular flowers.
If your bee balm is not blooming, it may be due to a lack of full sun. This plant thrives in at least 6 hours of direct sunlight per day.
If your bee balm is in a shady location, consider transplanting it to a sunnier spot. Also, ensure the plant is not receiving too much nitrogen, as this can promote foliage growth at the expense of blooms.
Spreading Vigorously
While the spreading nature of bee balm can be an asset in a large perennial border, it can become a problem if the plant starts to encroach on other specimens.
To control its spread, simply dig up the plant in early spring and divide it into new plants. You can also plant it in a small pot and sink the pot into the ground to contain the roots.
Other Guides from Planet Natural:


