

Several packets of native seed can sit beside each other on a potting bench and ask for very different treatment. One may be ready for an ordinary sowing. Another may need a period of cold and moisture first. A third may have additional requirements that a simple winter calendar cannot meet.
Before choosing a snowy day or collecting milk jugs, write down the botanical name and read the instructions for each species. That small record is the beginning of a useful native-seed calendar.
The calendar’s job is to organize the treatment your seeds require. It cannot decide that every native plant needs the same winter.
Keep the plant name with the instructions
“Native flowers” is too broad a label for a tray. Native to which region? Which species? What does its supplier recommend for this seed lot?
Start with region-appropriate plants and reliable species instructions. If the packet is brief, ask the supplier or consult a suitable botanical or extension resource. Resolve conflicting instructions before starting a treatment whose conditions and duration you do not understand.
Record the source of the advice alongside the name. A future note reading “chill for a while” is less useful than the precise recommendation you actually followed.
Your first page can be very simple:
| Record | Why it belongs on the calendar |
|---|---|
| Botanical name and seed source | Keeps the instructions attached to the right seed |
| Recommended preparation | Separates sowing from any pretreatment |
| Conditions and duration | Gives you something specific to plan and monitor |
| Intended sowing method | Distinguishes an indoor schedule from outdoor winter sowing |
| Start, check, and sowing dates | Turns the recommendation into jobs you can remember |
Leave space for observations. An outdoor marker, a paper packet, and a notebook should all refer to the same plant.

Dry storage is a different job
Putting a dry packet in a refrigerator may be a storage decision. Cold-moist pretreatment means exposing seed to specified cool, moist conditions to help overcome dormancy. The moisture is part of the treatment.
Do not count time spent in a dry refrigerated packet as cold-moist treatment unless the species instructions explicitly tell you to do so. The distinction matters because the calendar can look complete while the seed has never received what it needed.
Planet Natural’s introduction to seed stratification explains the basic concept. Use that introduction to understand the term, then return to the species-specific directions for the procedure and duration.
Some native seeds need no cold-moist period. Others need more complicated sequences. “Native” describes a relationship to place; it does not specify one germination recipe.
Choose the method before counting backward
For seeds with a suitable cold-moist requirement, outdoor containers and controlled refrigerator treatment can be options. Their calendars are different.
An outdoor flat follows local winter conditions. You plan its position, labels, drainage, protection from animals, and later checks. A refrigerator method follows the recommended preparation and duration more deliberately, with inspections for moisture, mold, or early germination.
University of Illinois Extension describes both approaches in its guide to starting a native prairie garden from seed. Its prairie examples are useful for understanding the choices. They do not supply a universal duration for every American native plant.
For a clearly hypothetical calendar exercise, suppose your reliable instructions call for 60 days of cold-moist treatment before a particular sowing date. Count backward from that date, record a start date, and add checks during the treatment. That arithmetic organizes the stated requirement; it is not a recommendation that your actual seed needs 60 days.
If the instructions describe a sequence rather than a single period, map each stage. If your sowing date or available space changes, update the plan instead of quietly shortening the treatment.
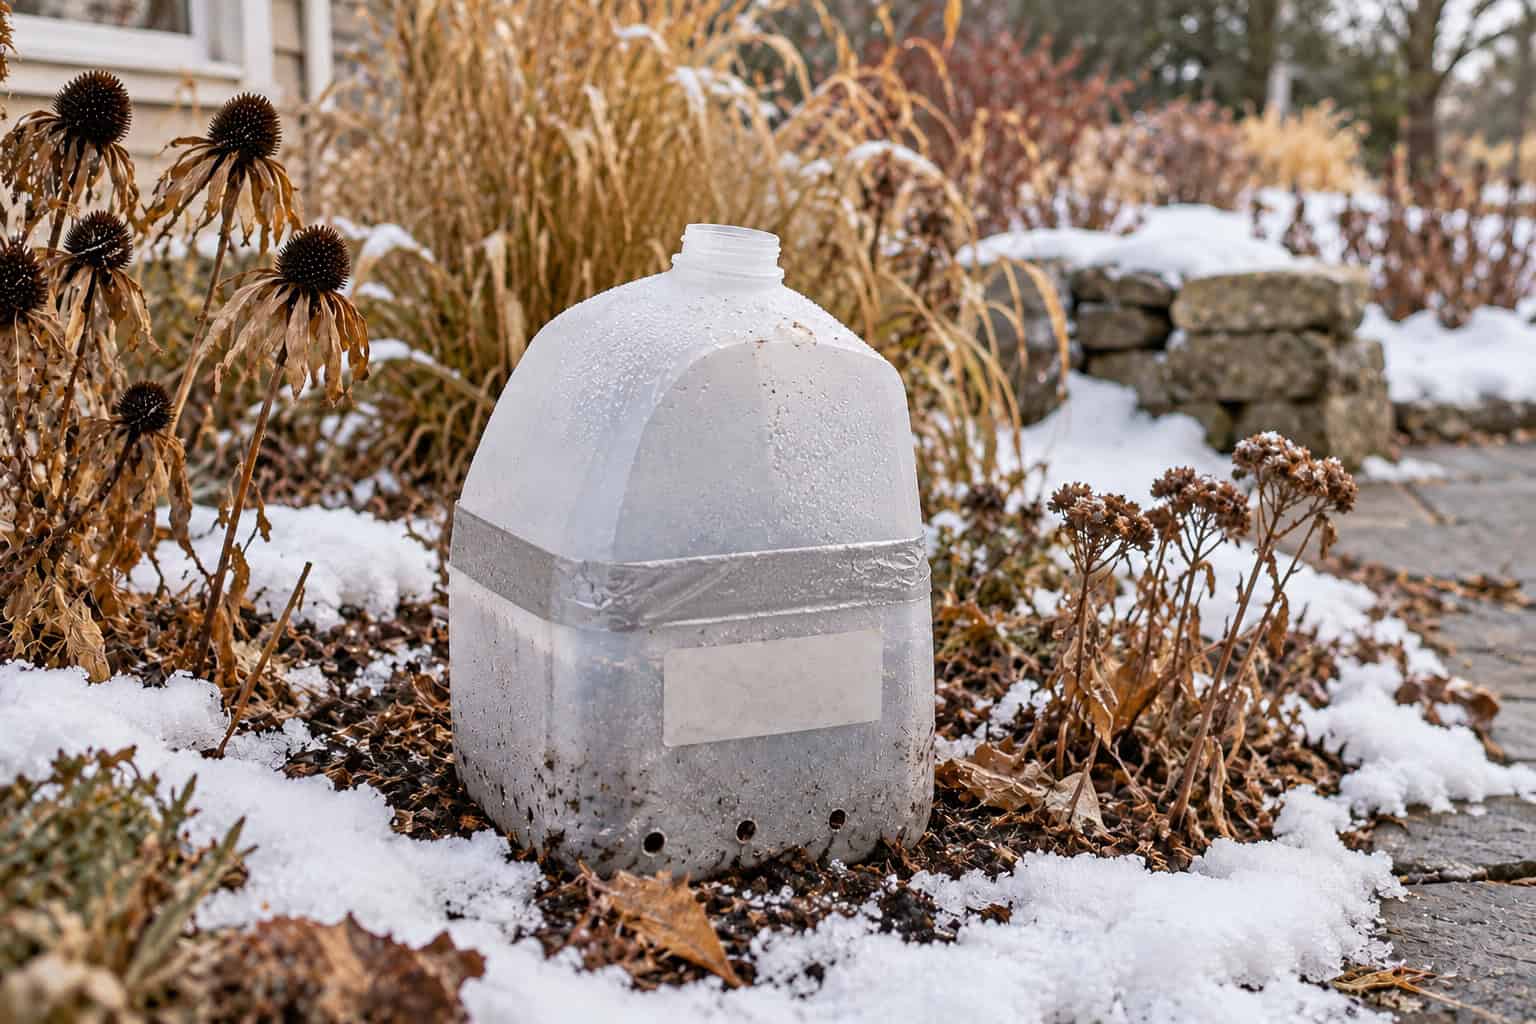
Outdoor winter sowing needs air and drainage
Winter-sown containers can protect seed from disturbance while allowing it to experience outdoor conditions. They still need a sound setup and attention as the season changes.
Illinois Extension’s winter-sowing instructions describe drainage holes in reused jugs and removal of the cap. The container is a vented growing space. Sealing it into an airtight bottle changes the method.
Follow an appropriate procedure for the container you use. Set it where drainage can work and where you can inspect it. Protect it from animals without taking away the weather exposure the method relies on.
Avoid copying a solstice date from a gardener in another climate. Illinois notes that warmer years can call for later sowing. Your local winter and the species instructions matter more than a ceremonial starting day.
As the weather warms and seedlings appear, ventilation and inspection become more important. A container left outside all winter is still capable of becoming too warm in spring sun.
Put checks on the calendar, too
A start date is only one entry. Add reminders to check the treatment or outdoor containers and note what you find.
For a refrigerator method, follow the instructions about moisture and containment. Inspect for unexpected germination, drying, or mold. If seeds germinate, you need a plan for their next stage rather than leaving them in storage until the printed date arrives.
For outdoor sowing, inspect the labels and drainage, especially after weather that could disturb the setup. Check moisture as appropriate to the container and conditions. Record the appearance of seedlings without treating the first green growth as a confirmed identity if weeds could also be present.
Permanent ink deserves inspection as well. A label that seemed durable in autumn can become unreadable outdoors. A second record keyed to the container can preserve the identity when a marker fails.
Plan the space after pretreatment
The calendar should continue past the day treatment ends. Where will you sow? Where will emerging plants receive appropriate light and care? How will they be identified through transplanting?
Our guide to organizing seed-starting supplies can help with the containers and growing-space side of that question. Native-seed preparation adds another layer of timing to the ordinary supplies list.
Start with a manageable number of species. A small, legible calendar is more useful than a crowded collection of treatments you cannot monitor.
This autumn, read the packets before counting winter days. Keep the names, instructions, and records together. Then let the calendar remind you of what those particular seeds need next.


